AWS Elastic Beanstalk is a PaaS service for web application hosting pretty much like Heroku, but instead of designed to be a PaaS at very beginning, it was actually built by combining different AWS services together. Since Elastic Beanstalk is a composition of different AWS services, it’s an open box, you can tune different AWS service components in the system you’re already familiar with, like load balancer, VPC, RDS and so and so on, you can also login the provisioned EC2 instances in the cluster and do whatever you want. However, as the all systems were not designed only for Elastic Beanstalk, a drawback there is - the system is a little bit too complex. Sometimes when you adjust the configuration, it takes a while to take effect, and sometimes there are some glitchs during the deployment process. Despite these minor issues, it’s still a great platform, if you build a higly scalable and higly available cluster on your own, it would be way more time consuming, and you will probably run into more problems Elastic Beanstalk already solved for you.
Overview of Elastic Beanstalk
Elastic Beanstalk supports many popular environments, Python, Java, Ruby and etc. The way it works is pretty simple, you upload a zip file which contains the application code in certain predefined file structure, and that’s it, AWS runs it for you. For example, to use Python, you need to provide a requiements.txt file in the root folder. The structure in the application zip file would look like this
my_application.zip
    requirements.txt
    application.py
    my_app/
        __init__.py
        ...
In Elastic Beanstalk, this file is called a Version of the application. You can upload several versions to the application. Then, to deploy the application, you need to create an entity called Environment. An environment is actually a cluster running a specific verion of application with certain adjustable configuration. An environment may look like this
- Application: my_application-1.0.1
- Load Balancer: YES
- Min instances number: 3
- Max instances number: 5
- VPC: vpc-abcdefgh
- …
And for the same application, you can have mutiple environments, like this
my_application
    my-app-development
        Version 1.0.5
        Instances: 1
    my-app-stage
          Version 1.0.4
        Instances: 2
    my-app-production
        Version 1.0.1
        Instances: 8
It’s pretty neat, you can run different versions of your application in different stack with different configuration. This makes testing much easier, you can simply create a new environment, run some tests against it, tear it down once the test is done. You can also launch a new production environment, make sure it is working then point the DNS record from the old environment to the new one.
Deploy an application as Docker image steps-by-steps
Although the Elastic Beanstalk system itself is very complex, using it is not so difficult. However, it seems there is no an obvious walkthrough guide for setting things up. The offical AWS document is really not so readable. And for Docker, it’s still pretty new technology, you can find very few articles about how to run Docker with Ealstic Beanstalk out there. So, here I write a guide about running a simple application as Docker image with Elastic Beanstalk steps-by-steps.
Install Elastic Beanstalk commandline tool
Before we get started, you need to install Elastic Beanstalk commandline tool, it’s written in Python, so you need to have pip installed in your system, here you run
pip install awsebcli
Then, remember to expose your AWS credentials in the bash environment
export AWS_ACCESS_KEY_ID=<Your aws access key>
export AWS_SECRET_ACCESS_KEY=<Your aws secret key>
Get started with your project and application
Okay, now, let’s get started with our demo project.
mkdir docker-eb-demo
cd docker-eb-demo
git init .
Next, init our Elastic Beanstalk app.
eb init

Select a default region
1) us-east-1 : US East (N. Virginia)
2) us-west-1 : US West (N. California)
3) us-west-2 : US West (Oregon)
4) eu-west-1 : EU (Ireland)
5) eu-central-1 : EU (Frankfurt)
6) ap-southeast-1 : Asia Pacific (Singapore)
7) ap-southeast-2 : Asia Pacific (Sydney)
8) ap-northeast-1 : Asia Pacific (Tokyo)
9) sa-east-1 : South America (Sao Paulo)
(default is 3):

Select an application to use
1) foo
2) bar
3) [ Create new Application ]
(default is 3): 3

Enter Application Name
(default is "docker-eb-demo"):

Select a platform.
1) PHP
2) Node.js
3) IIS
4) Tomcat
5) Python
6) Ruby
7) Docker
8) GlassFish
(default is 1): 7

Select a platform version.
1) Docker 1.3.2
2) Docker 1.2.0
3) Docker 1.0.0
(default is 1):

Do you want to set up SSH for your instances?
(y/n): y

Select a keypair.
1) my-demo-key
2) [ Create new KeyPair ]
(default is 2): 1
You have created an application now, to see it in the AWS dashboard, you can type
eb console
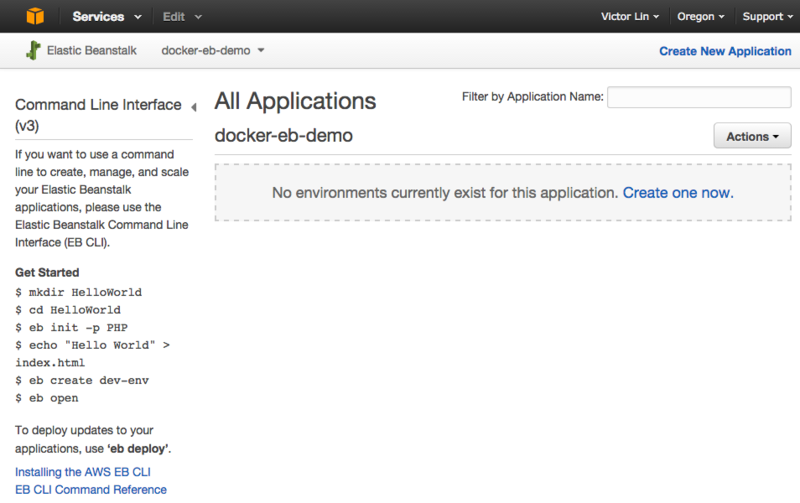
And you should be able to see our docker-eb-demo application there.

Actually, you can also create the application first in the dashboard, then use eb init command and select the existing application, either way it creates a config file at .elasticbeanstalk/config.yml.
Let’s build a simple Flask app
We are here just to demonstrate how to run a Docker application with Elastic Beanstalk, so no need to build a complex system, just a simple Flask app.
from __future__ import unicode_literals
import os
import pprint
import StringIO

from flask import Flask
from flask import request

app = Flask(__name__)


@app.route("/")
def echo():
    stream = StringIO.StringIO()
    indent = int(os.environ.get('PRINT_INDENT', 1))
    pprint.pprint(request.environ, indent=indent, stream=stream)
    return stream.getvalue()


def main():
    app.run(
        host=os.environ.get('HTTP_HOST', '0.0.0.0'),
        port=int(os.environ.get('HTTP_PORT', 80)),
        debug=int(os.environ.get('DEBUG', 0)),
    )

if __name__ == "__main__":
    main()
What it does is very simple, it prints the WSGI environment dict of request, hence, we call it echoapp. You may notice that we read PRINT_INDENT as the print indent, and many other variables for running the HTTP server. As long as either Docker or Elastic Beanstalk use environment variables for application configuration, to make your application configurable, remember always to read application settings from environment variables instead of configuration files.
Build the docker image
To build the docker image, I like to use git archive make a snapshot of the project and add it into container by ADD command. By doing that, I won’t build an image contains some development modification accidently. However, since Dockerfile is not good at doing some preparing steps before building the image, so I like to use a Makefile for doing that. Here you go
NAME=fangpenlin/echoapp
VERSION=`git describe`
CORE_VERSION=HEAD

all: prepare build

prepare:
    git archive -o docker/echoapp.tar HEAD

build:
    docker build -t $(NAME):$(VERSION) --rm docker

tag_latest:
    docker tag $(NAME):$(VERSION) $(NAME):latest

test:
    nosetests -sv

push:
    docker push $(NAME):$(VERSION)
and for the Dockerfile
FROM phusion/baseimage:0.9.15
MAINTAINER Fang-Pen Lin <[email protected]>

# install dependencies
RUN apt-get -qq update && \
    apt-get install -y \
        python \
        python-pip \
    && \
    apt-get clean && rm -rf /var/lib/apt/lists/* /tmp/* /var/tmp/*

RUN easy_install -U setuptools && \
    pip install -U pip

# add echoapp service
ADD echoapp.sh /etc/service/echoapp/run
RUN chmod +x /etc/service/echoapp/run

# install packages
ADD echoapp.tar /srv/echoapp
RUN pip install -e /srv/echoapp

VOLUME ["/var/log"]
ENTRYPOINT ["/sbin/my_init"]
EXPOSE 80
We use phusion/baseimage as the base image. It’s basically a modified version of Ubuntu, to make it suitable for running inside Docker container. It provides runit service daemon, so we simply install the app and create the service at /etc/service/echoapp/run.
With these files, here you can run
make
to build the Docker image. Then you can test it by running
docker run -P -it <the docker image id>
and use docker ps to see the mapped port
docker ps
and curl to the server
curl 0.0.0.0:<mapped port>
Notice: if you are using boot2docker under OSX environment, you should run boot2docker ip to see what’s the IP address of the virtual machine and connect to it instead of 0.0.0.0.
Upload your application to Docker registry
There are two ways to run Docker apps with Elastic Beanstalk, one is to let them build the Dockerfile for you everytime you deploy an application. I don’t really like this approach, since the value of Docker is that you can build your software as a solid unit then test it and ship it anywhere. When you build the Docker image on the server every time you deploy, then it’s meanlingless to use it. So I would prefer another approach. The other way for running Docker is to create a Dockerrun.aws.json file in the root folder of your project. In that file, you indicate where your Docker image can be pulled from. Here is the JSON file
{
  "AWSEBDockerrunVersion": "1",
  "Image": {
    "Name": "fangpenlin/echoapp",
    "Update": "true"
  },
  "Authentication": {
      "Bucket": "my-secret-s3-bucket",
      "Key": "docker/.dockercfg"
  },
  "Ports": [
    {
      "ContainerPort": "80"
    }
  ],
  "Logging": "/var/log/"
}
As you can see we indicate the Docker image name is fangpenlin/echoapp, Elastic Beanstalk will then pull and run it for you. If your Docker image in Docker hub is a private one, you will need to provide Authentication information, which points to an S3 file contains .dockercfg file (the file can be generated by docker login command at your home directory). If you provide the S3 .dockercfg file, remember to add proper permissions to the EC2 instance profile for running Elastic Beanstalk so that it can be accessed. And yes, of course, in the previous step, we didn’t upload it to Docker hub. You can do it by
make push
Or if you prefer to do it manually, you can also use docker push command to do that.
The Ports and Logging indicate which port your docker image exposes, and the path to logging files. Elastic Beanstalk will redirect traffic to the port and tail the logging files in that folder for you.
Create our development environment
Okay, we have our Docker image ready to be deployed now. To deploy it, we need to create an environment first. Here you run
eb create

Enter Environment Name
(default is docker-eb-demo-dev):
Enter DNS CNAME prefix
(default is docker-eb-demo-dev):
Environment details for: docker-eb-demo-dev
  Application name: docker-eb-demo
  Region: us-west-2
  Deployed Version: bcb7
  Environment ID: e-9332pphazb
  Platform: 64bit Amazon Linux 2014.09 v1.0.10 running Docker 1.3.2
  Tier: WebServer-Standard-1.0
  CNAME: docker-eb-demo-dev.elasticbeanstalk.com
  Updated: 2014-12-05 06:23:45.814000+00:00
Printing Status:
INFO: createEnvironment is starting.
...
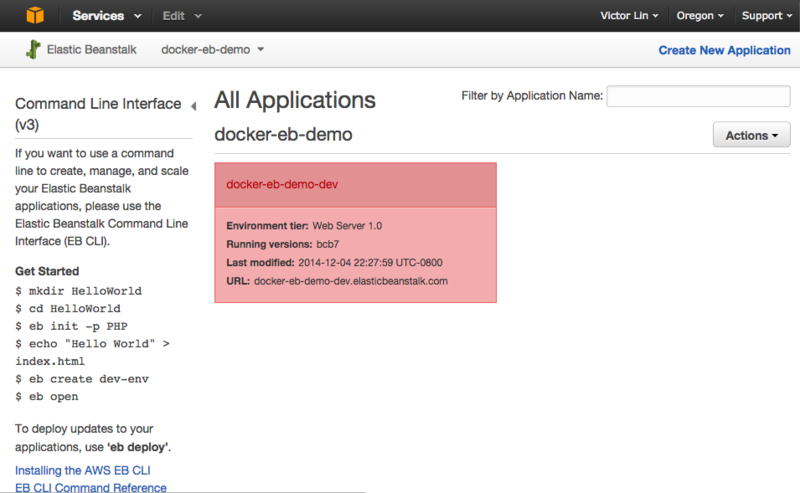
It takes a while before the environment gets ready. To create an environment, you can also use AWS dashboard, then run eb use <name of environment> to bind current git branch with the created environment. To see your created environment, you can type eb console and see it in the dashboard

If you see the environment is red, or there was some errors when running eb create, you can run
eb logs
and
eb events
to see whats going on there. You can also visit the application in browser by typing
eb open
to see the status of environment, type
eb status
Deploy a new version
After you do some modifications to your app, you do a git commit, build a new Docker image and push it to the Docker hub. Then you can run
eb deploy
to deploy the new image to all servers.
For production usage, I would suggest you pin the version number in Dockerrun.aws.json file. For example, the image name should be something like this
fangpenlin/echoapp:1.0.1
In that way, when you run eb deploy, it takes a snapshot of your current git commit and upload it as a Version. When it get deployed, the specific version of Docker image can then be pulled and installed. If you don’t specify the tag, then latest image will be pulled and installed. That’s not a good idea for production environment since you may want to roll back to the previous version if the new one is broken.
Set the environment variable
To see current environment variables, it’s easy, simply type
eb printenv
And to update it, for example, we want to change PRINT_INDENT to 4 and enable DEBUG, here you type
eb setenv PRINT_INDENT=4 DEBUG=1
That’s it
That’s it. It’s actually not that hard to run your Docker image with Elastic Beanstalk, just trivials. Once you get familiar with it, that’s a piece of cake. The whole demo project can be found here: docker-eb-demo. Hope you enjoy running Docker with Elastic Beanstalk as I do :)
