Update: This is the second article in the CADing and 3D printing series. You can read other articles here:
In my previous article, I’ve shared my journey of 3D printing and learning CAD from the perspective of a software engineer. As mentioned in the article, I really wanted to build a server rack for my bare metal Kubernetes cluster as seen in this article. Recently, I finally got some time to actually print some projects I have designed so far. Today, I am excited to introduce what I’ve built - TinyRack, a modular rack for mini servers!

TinyRack with my mini PC cluster
I imagine many people would enjoy a server rack designed specifically for mini servers, given how popular homelabs have become in recent years, so I share my models under an open license. You can download all the models from TinyRack.io and print them yourself, or you can also purchase them on the website.
Why not just use 1U rack?
Look at people’s homelabs, many of them use 1U server racks as their main rack. Certainly there are many benefits of using the standard U server rack. First of all, most data centers are built around the 19 inch rack standard. There are countless pieces of gear you can buy out there which are 19 inch rack compatible. So the first obvious question you may ask is, why not just use the U rack?
Well, while the U server rack is very popular, first of all, its form factor is just too big. Thanks to advances in chip manufacturing technologies, CPUs / GPUs are becoming more and more powerful while consuming less and less power. In the context of homelab or mini server based clusters, they are usually way smaller than the 1U size. As a result, one may need to adapt to the U size by buying an adapter. But these pieces of equipment are geared toward enterprises mostly, and they are expensive. Take Mac Mini for example, if you want to mount your Mac Minis to a U rack, you can buy some of those:
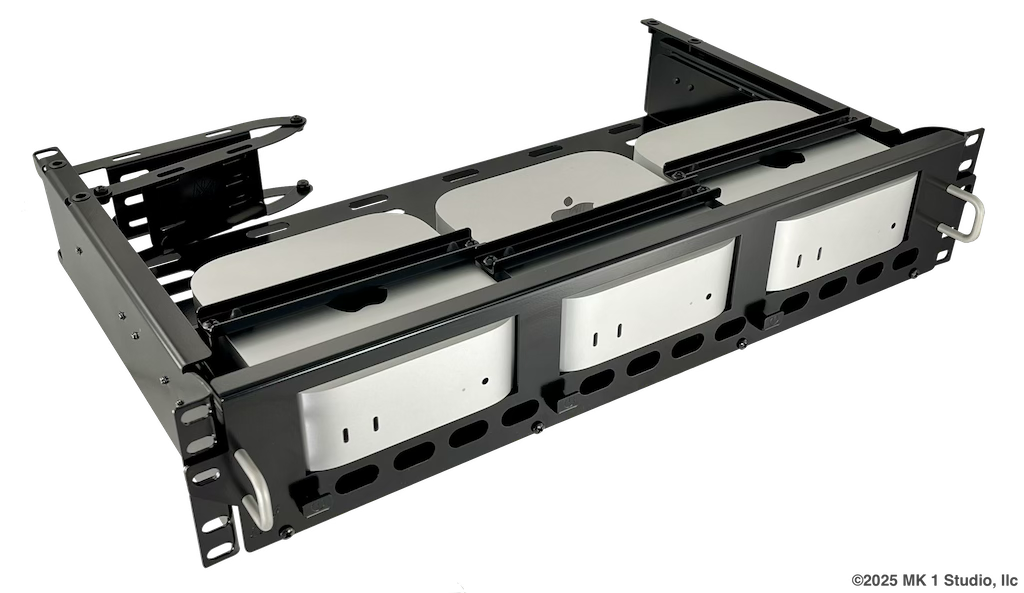
A Mac Mini rack mount for 1U server rack from MK1 Manufacturing
Certainly they could work, but they are also very expensive. Just the rack itself set you back $459.90 USD, while the most basic Mac Mini itself costs $599.00 USD. There are also cheaper options like this one that are not as good.
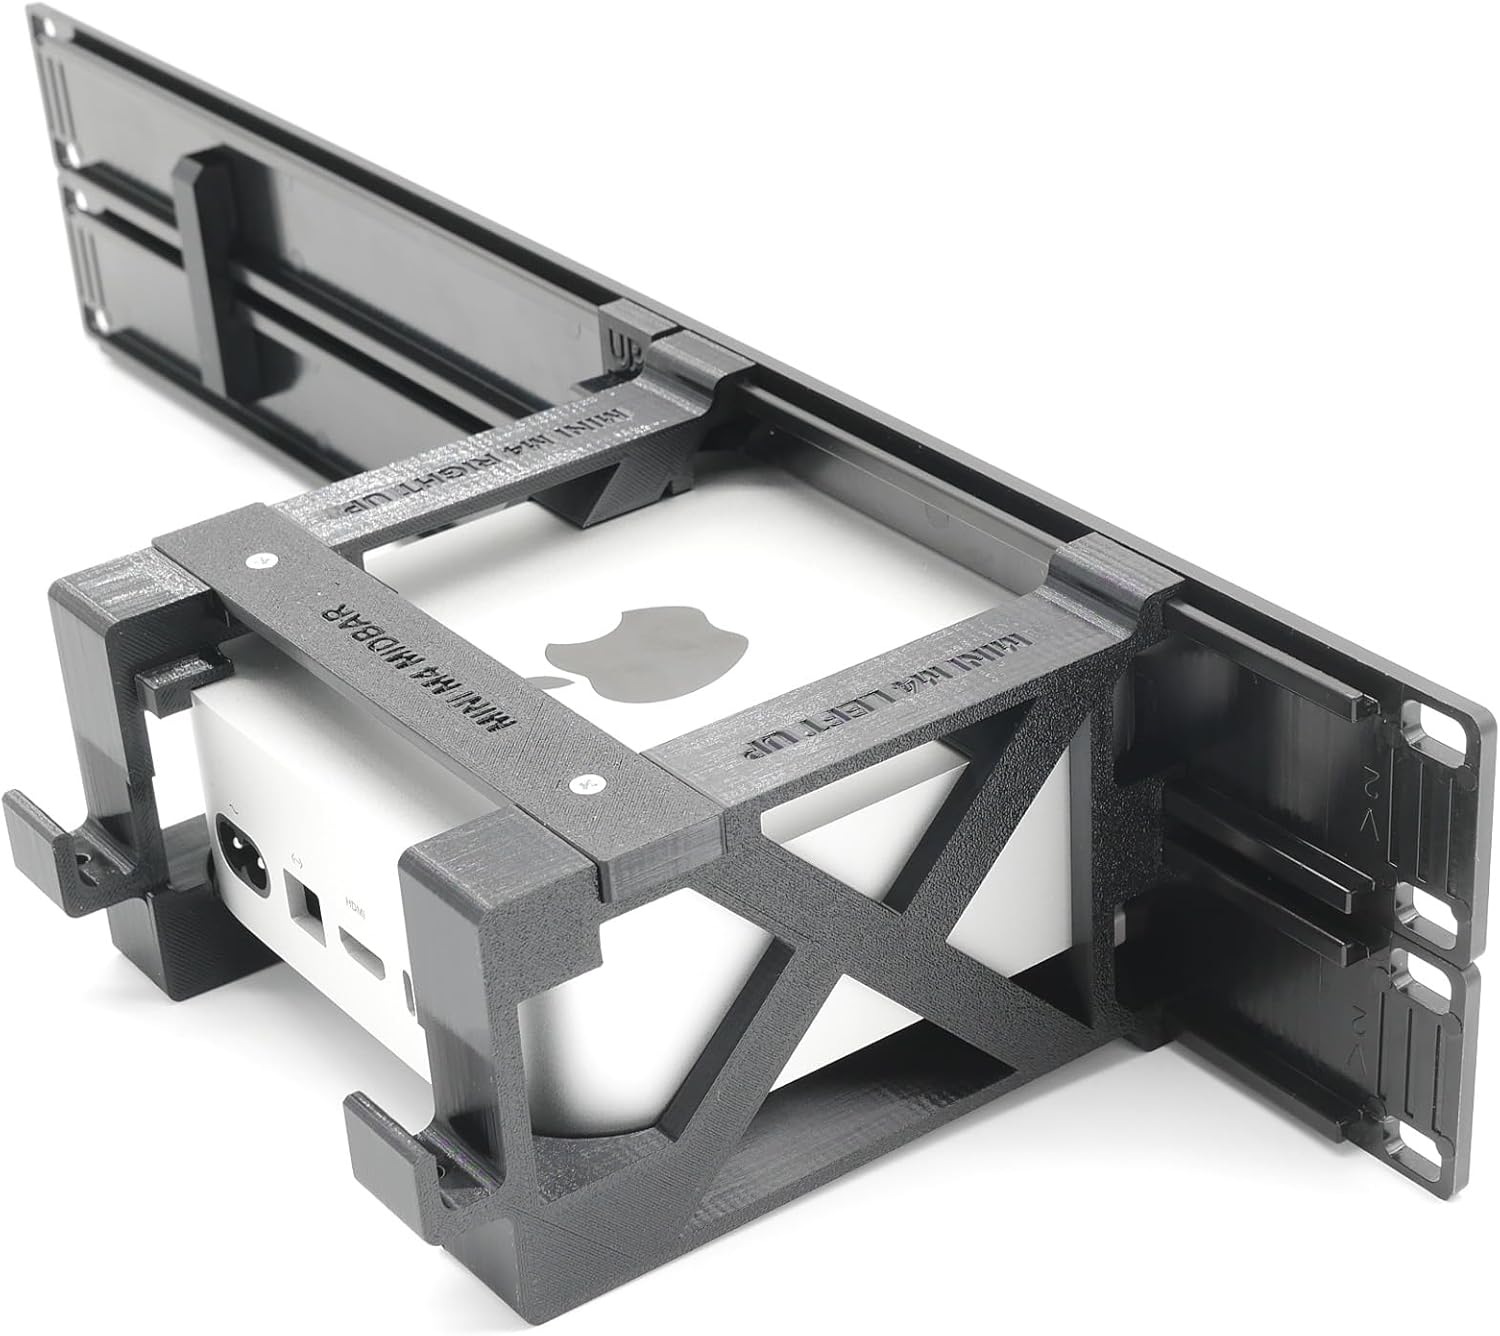
A Mac Mini rack mount for 1U server rack from Amazon
As you can see, it’s more obvious in the second picture that the load goes through only the front panel while the Mac Mini themselves are not being held by anything else. This is still a okay situation as long as the device is not too heavy and the plate is not too deep and making the torque too high. But more often than not, I have saw way too many times where people have to attach one side of their tiny device to the U rack, leaving another side hanging in the air because the size of the device is just way too small. As the design of the U rack is taking the load through the ears of the rack, the material required for the U rack is usually thicker and heavier. So, as you can see, the U server rack is not really designed for mini servers.
Yet another thing to think about is the benefits of living in the 3D printing era, where everything is customizable. Why do we want to force ourselves into form factors which are not suitable at all? With the above in mind, I think it’s time to design a server rack.
Project MINI RACK?
Fun fact, originally the name of the project I had in mind was Mini Rack. Until I saw the YouTuber Jeff Geerling introduce his Project Mini Rack.
Picture from Jeff Geerling's Mini Racks mini-rack.jeffgeerling.com
After that I’ve decided to change the project name to TinyRack to avoid confusion. A bit like my TinyRack project, the Project Mini Rack is targeting mini form factor servers. I really like the concept, it’s super cool that the whole server rack is portable without going offline if you have a UPS built into the rack. But it’s based on the 1U standard, and the rack you can buy from Amazon costs $129.99 as of when I wrote this article. It’s a bit overkill with the heavy duty metal rack. For now, I only want a modular server rack that can host my cluster on top of it and potentially be extended with different modules. That’s why, despite having seen a project like that, I still decided to continue building my own. I think there’s some overlap with the target audience, but overall, TinyRack is targeting more lightweight users who prefer a rack with a smaller footprint and a more flexible design. And more importantly, it’s all 3D printable!
The design
When designing the rack, I wanted to make it able to carry as heavy a load as possible. Because while mini servers are not too heavy compared to a full 1U server, they aren’t lightweight either. There could also be many devices to put on top of the rack. I have purchased some Wire Racks and assembled them a while back. I got inspiration from the way they work. You have rods taking vertical loads, with the plastic clips that come with a ramp and that clamp on the rod’s notch, and with the wire rack mounting on top of them. Surprisingly, this simple structure can take a ton of load.
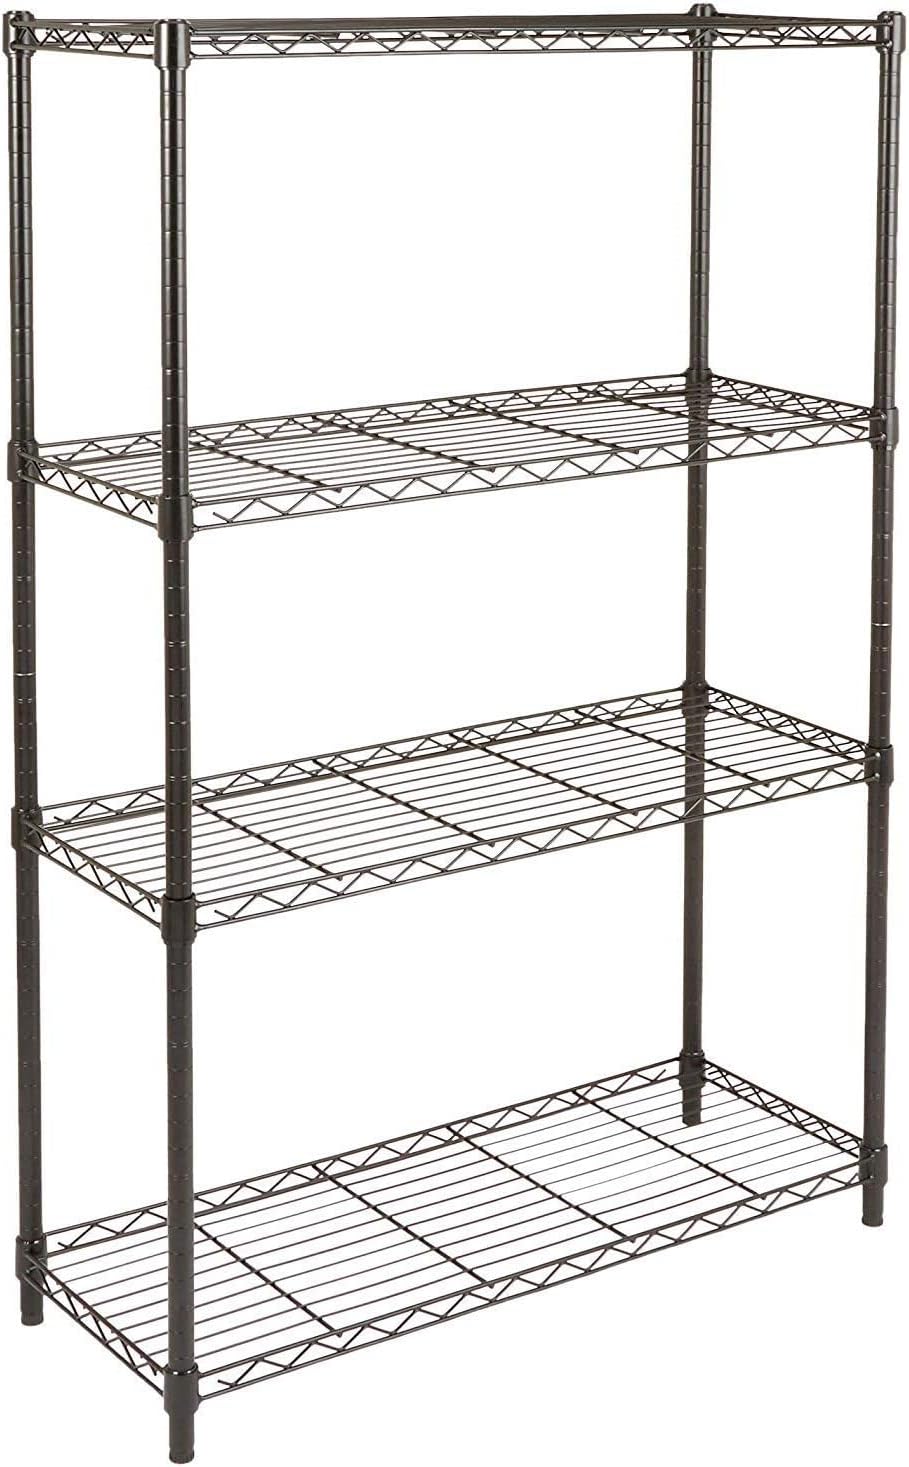
A Wire Rack from Amazon
I wanted to design a similar structure, with a strong post, with notches cut into it every so often. Have a clip with a ramp that hooks on top of the notch. Then the platform has holes that can sit on top of the clip, and because of the ramp of the clip, the platform will be stuck more firmly when a load is applied.
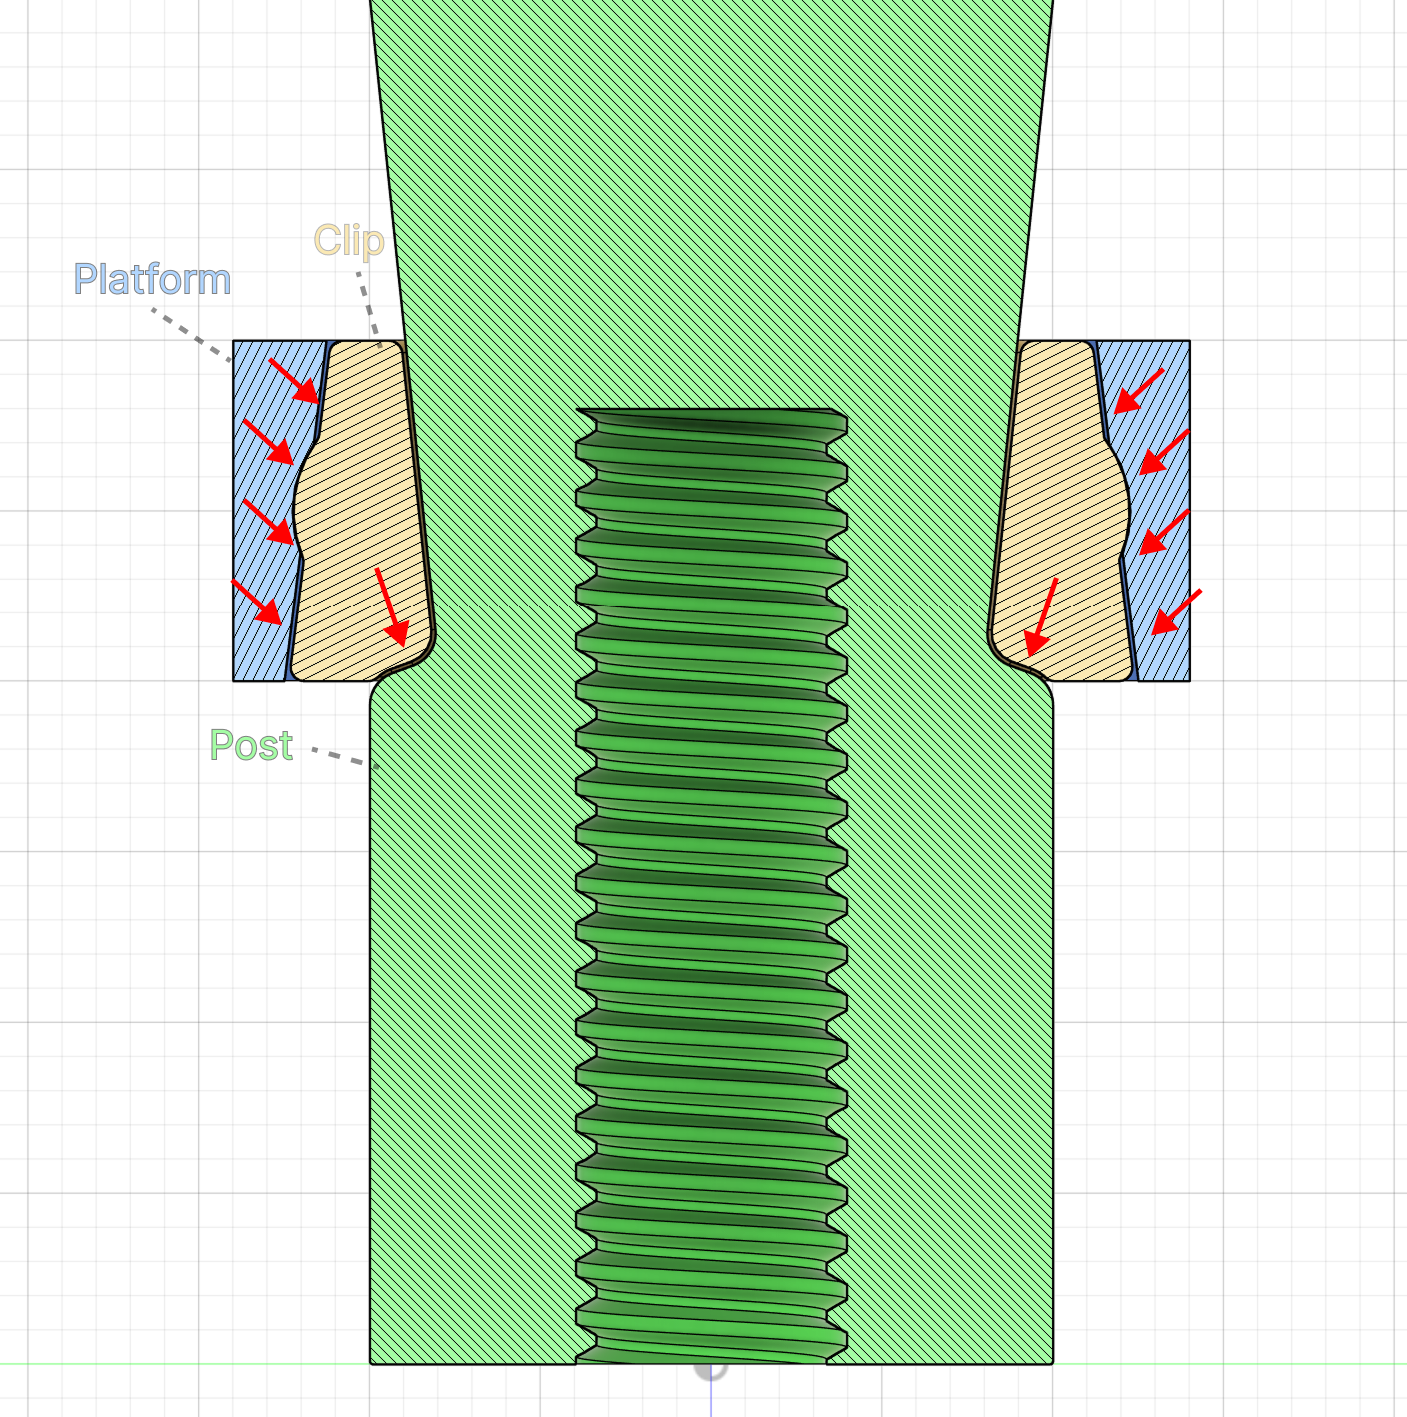
The design of the TinyRack load bearing structure, the platform pushes against the clip, and the clip pushes against the post's notch
A clip looks like this:

The design of a clip in the CAD model
And here’s how the whole post looks like:
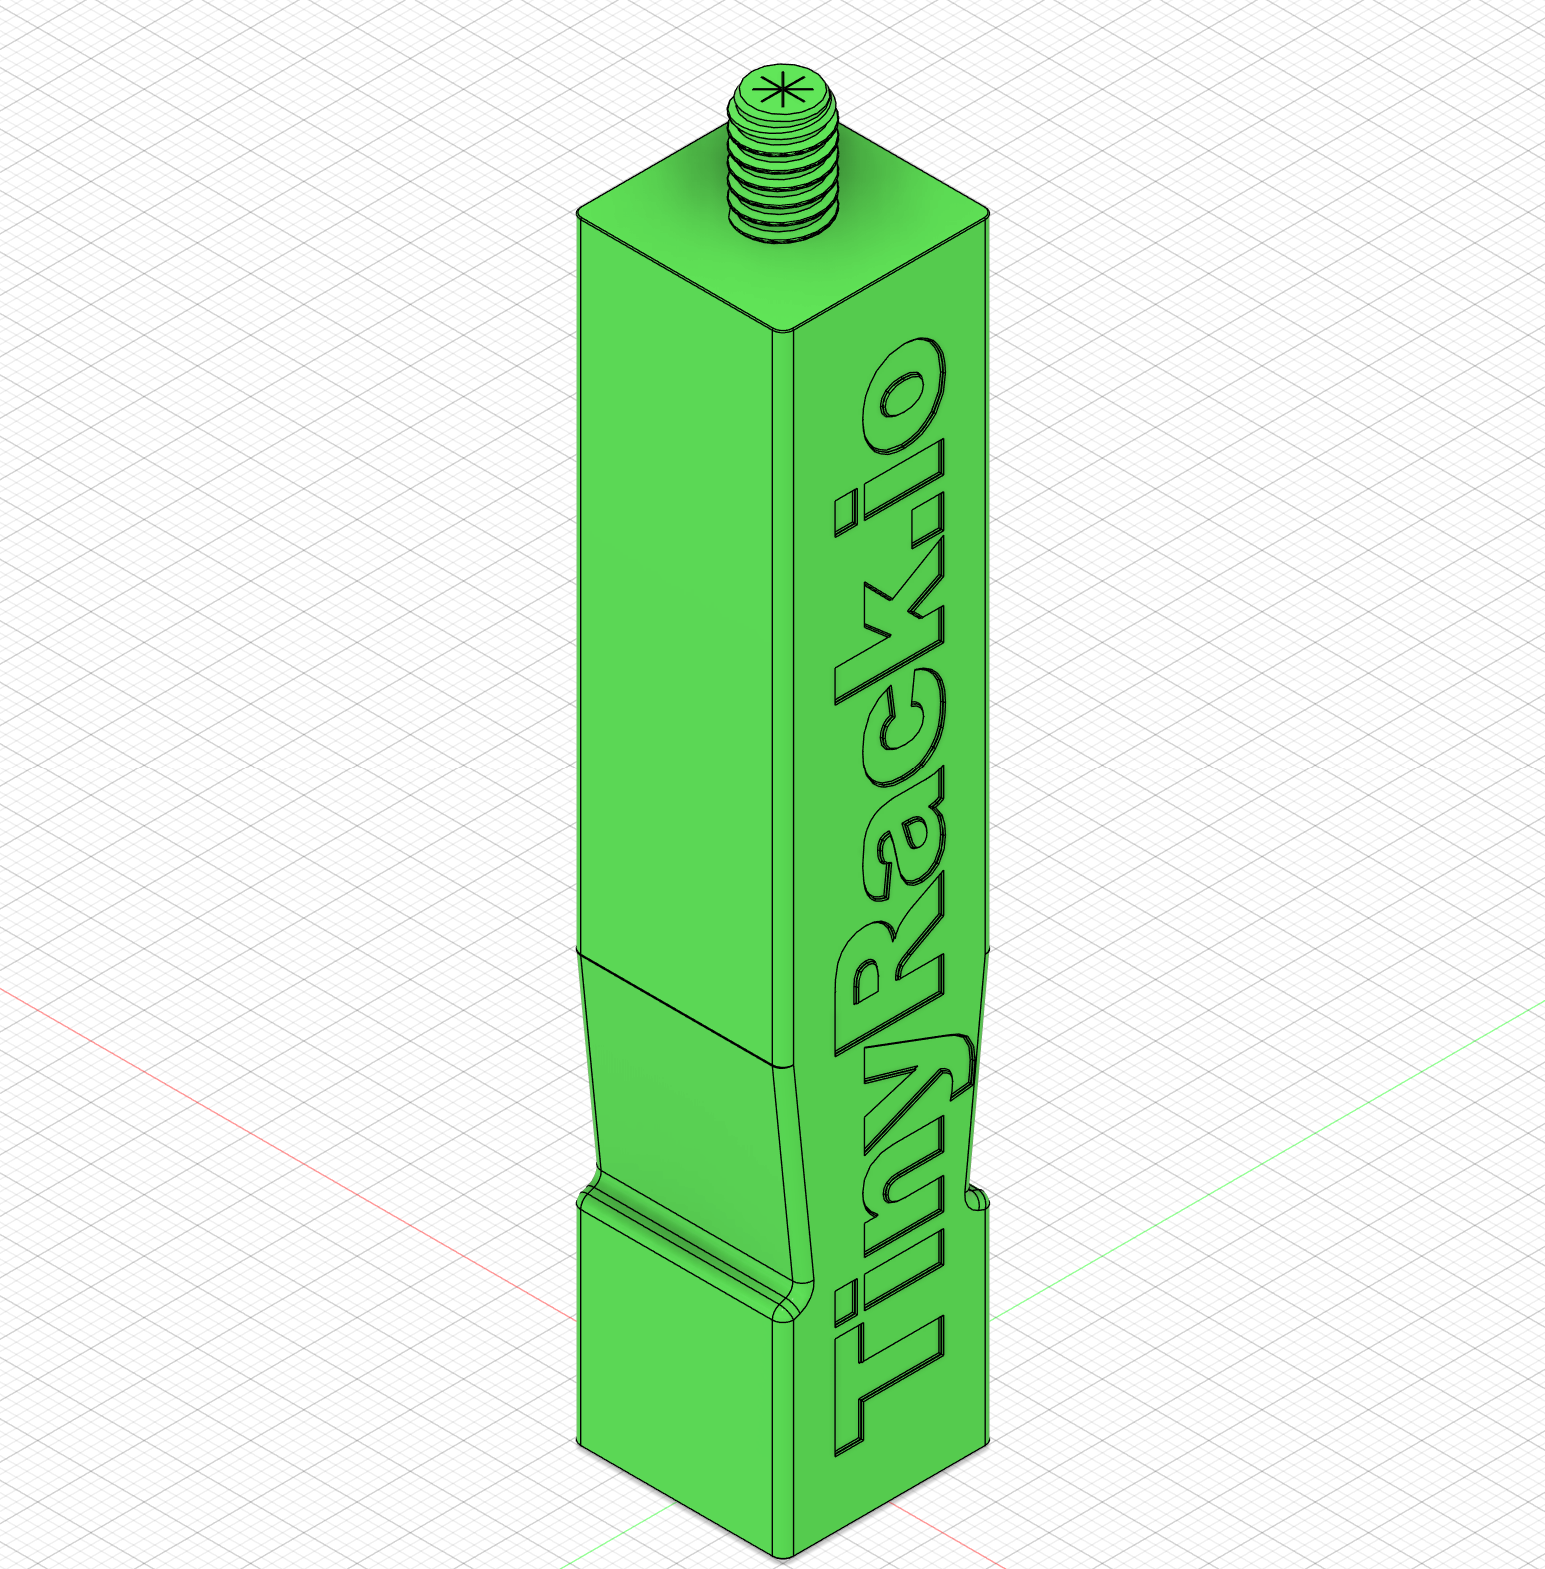
The design of a post with a notch for holding the platform in the CAD model
And the platform looks like this:
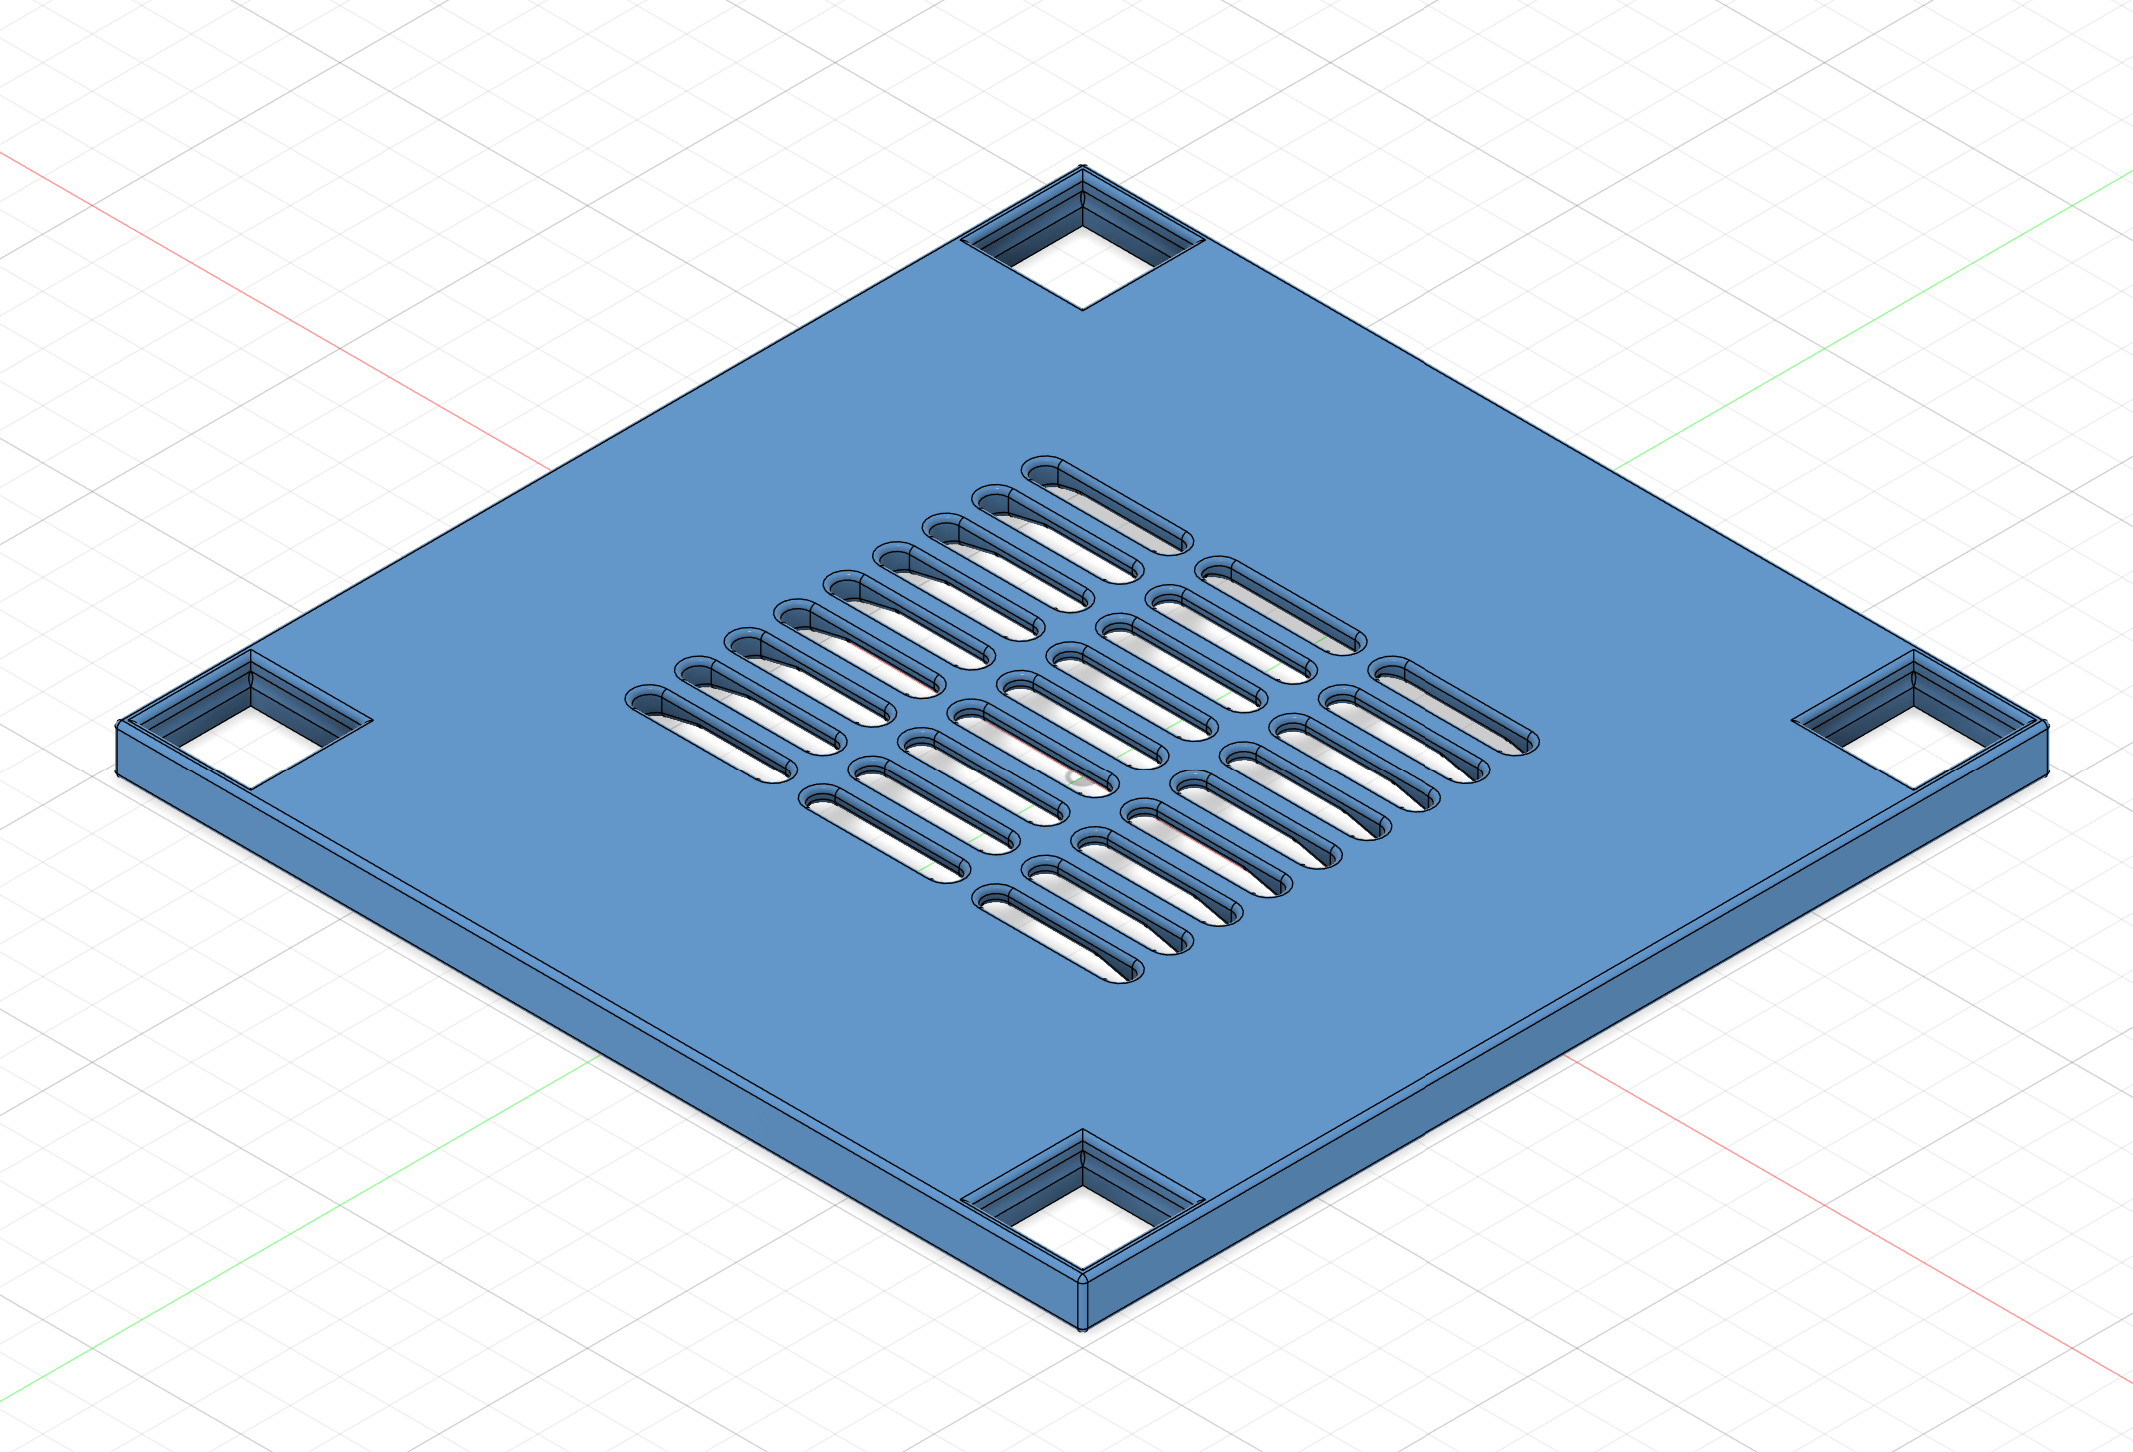
The design of a platform in the CAD model
And I wanted to have a rubber leveling feet for each post, to absorb vibration, so I added a thread at the bottom. The size of the thread is set to 5/16” (8mm) so that you can buy rubber feet from Amazon and install them by screwing them into the thread.
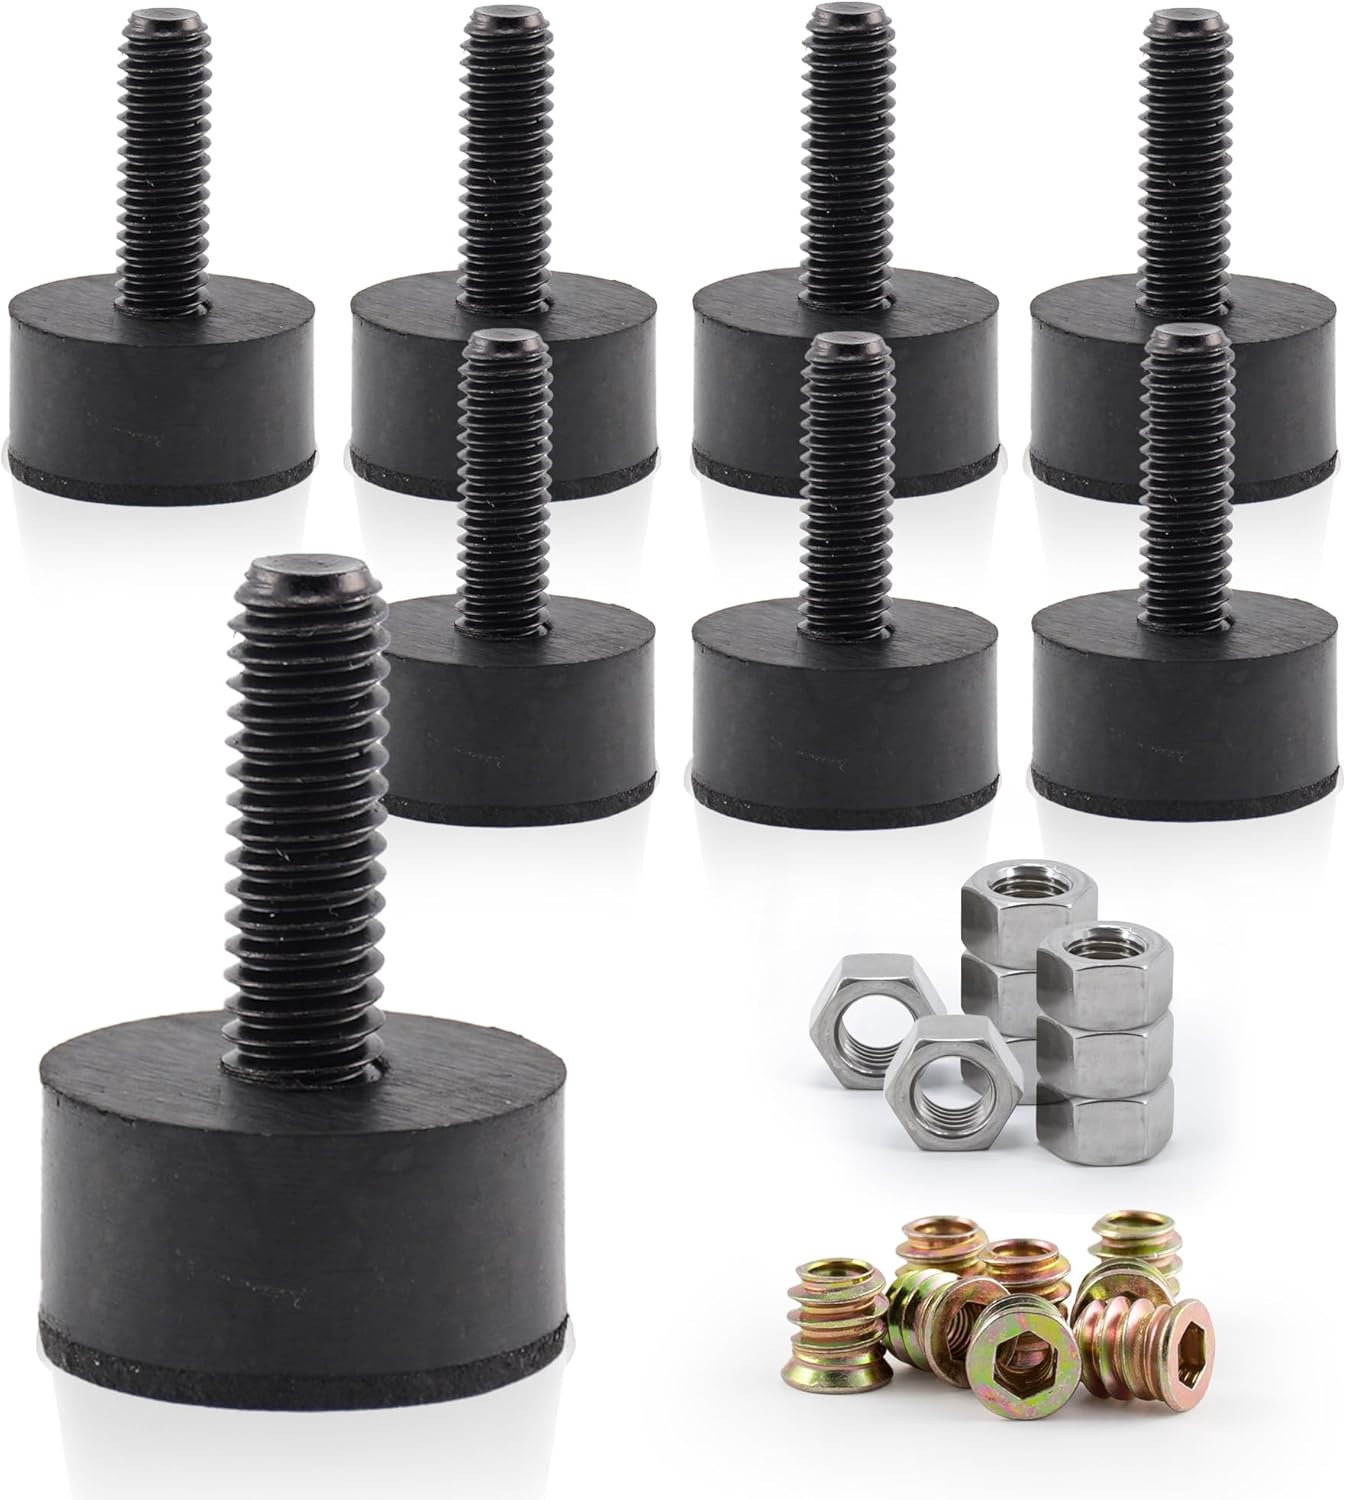
A rubber leveling feet from Amazon
And because the posts have limited height, I also added a screw hole on top of the post so that you can attach multiple posts together. The whole assembly looks like this in the CAD model:
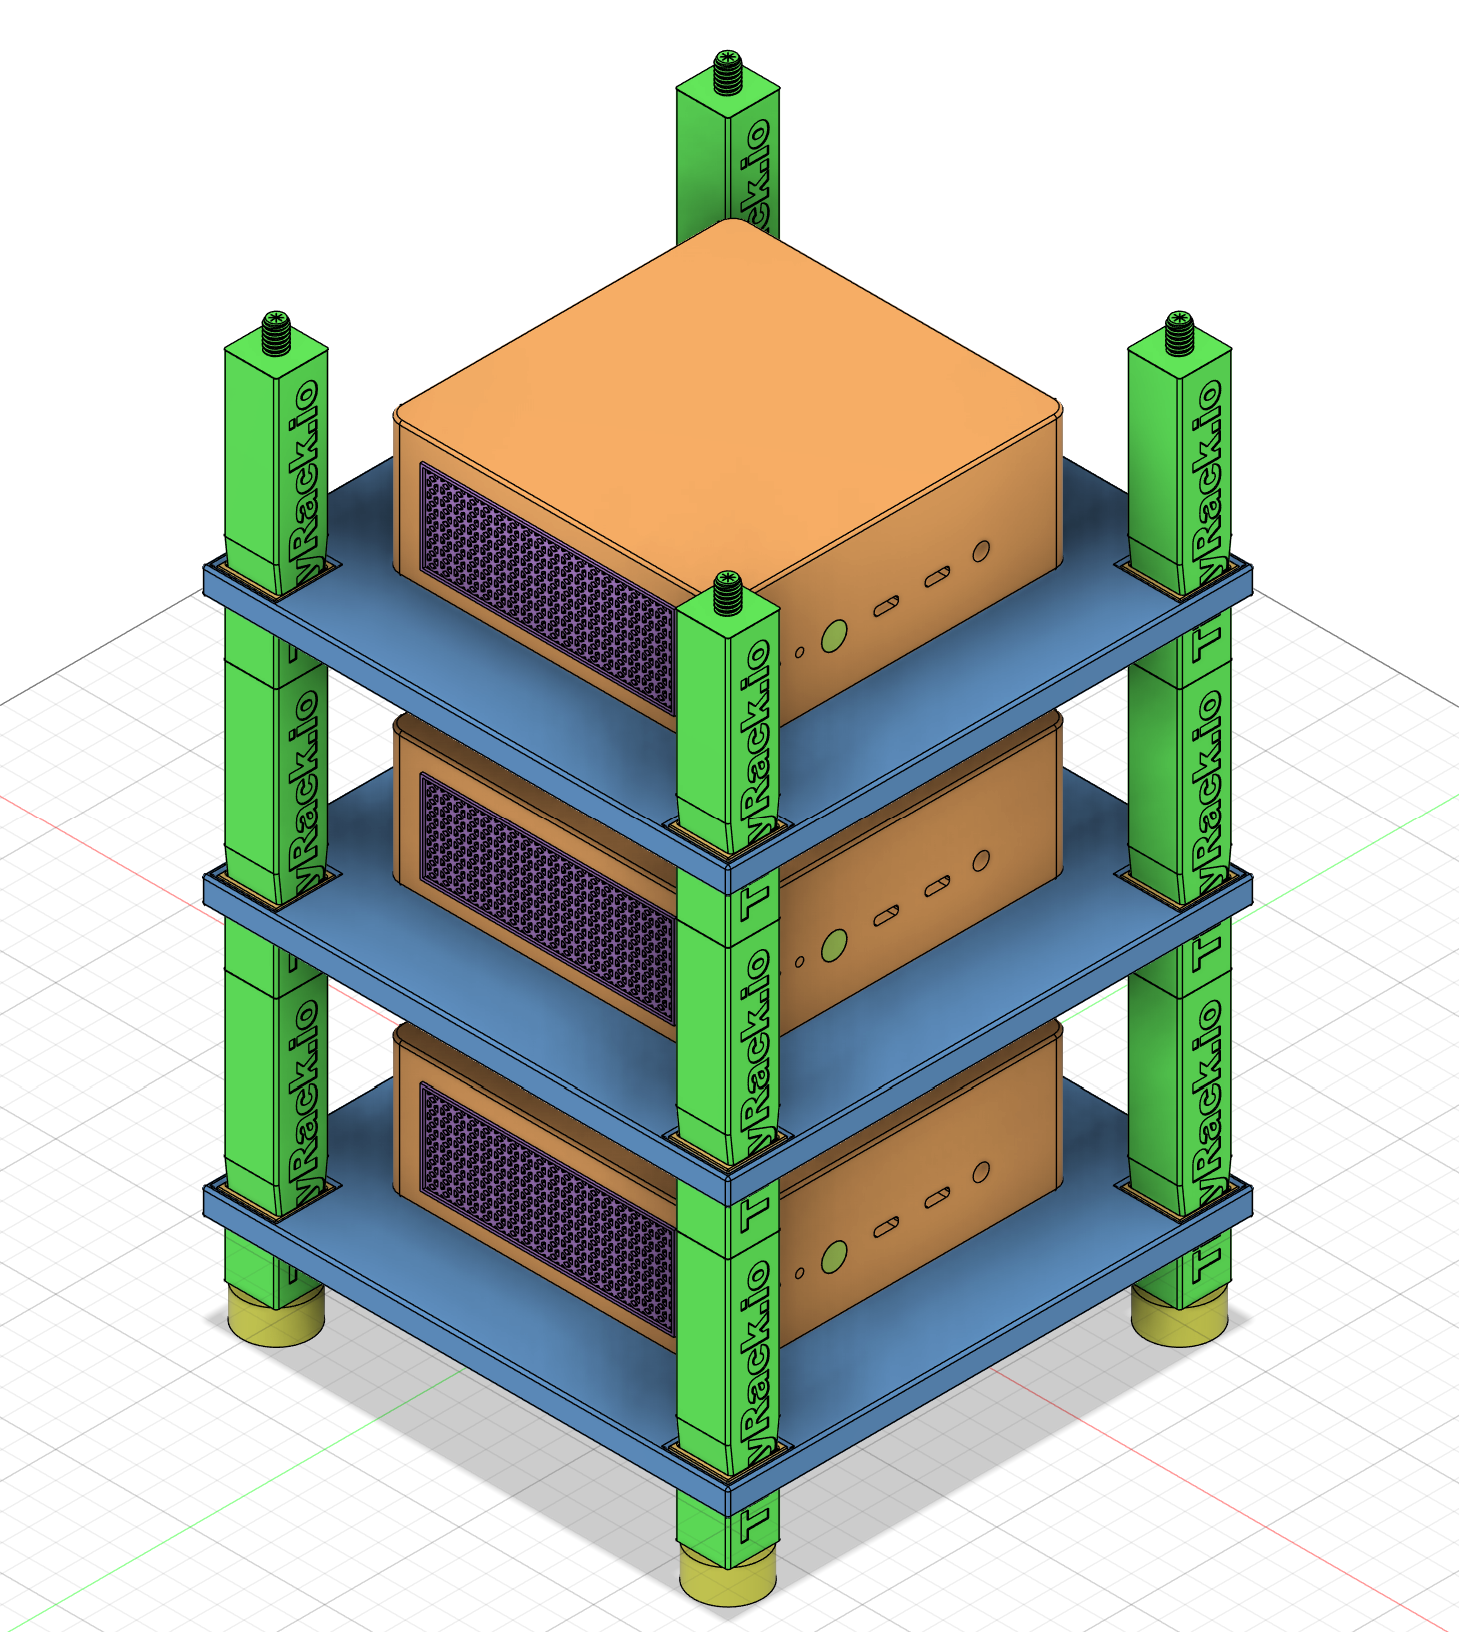
The whole assembly of the TinyRack in the CAD model
The cherry on the top, the JetKVM mount
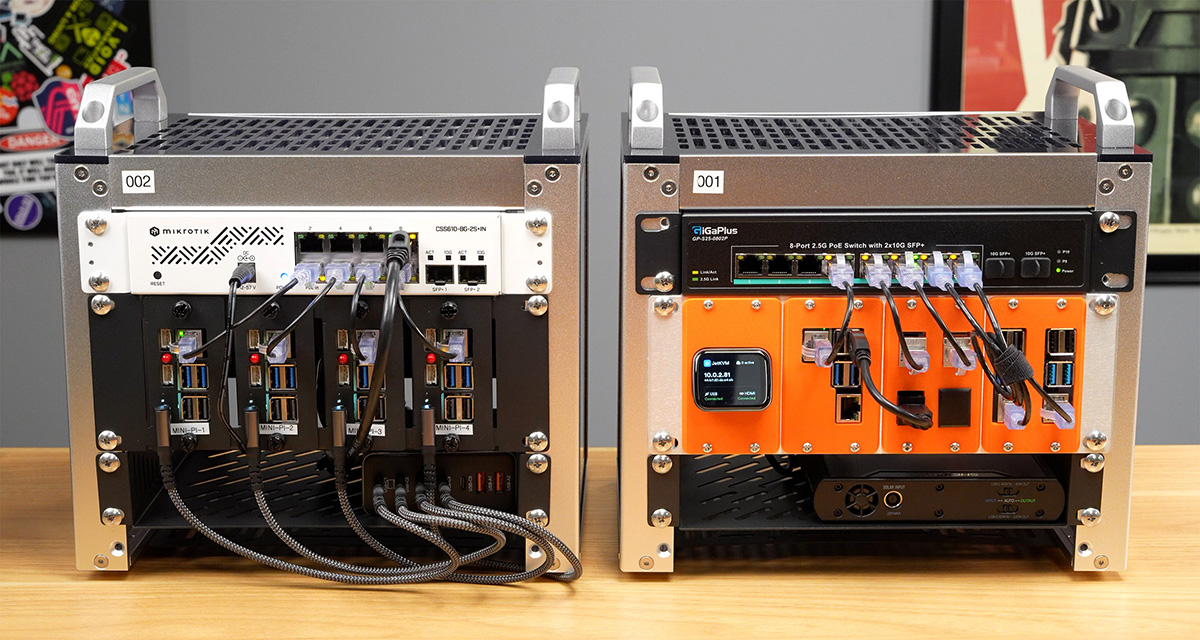
On top of the three mini PCs in my bare metal Kubernetes cluster, I also found myself in need of a remote KVM system. A while back, I found a new affordable KVM system called JetKVM that pretty much meets my requirements. It’s very tiny, yet provides most of the features I need.
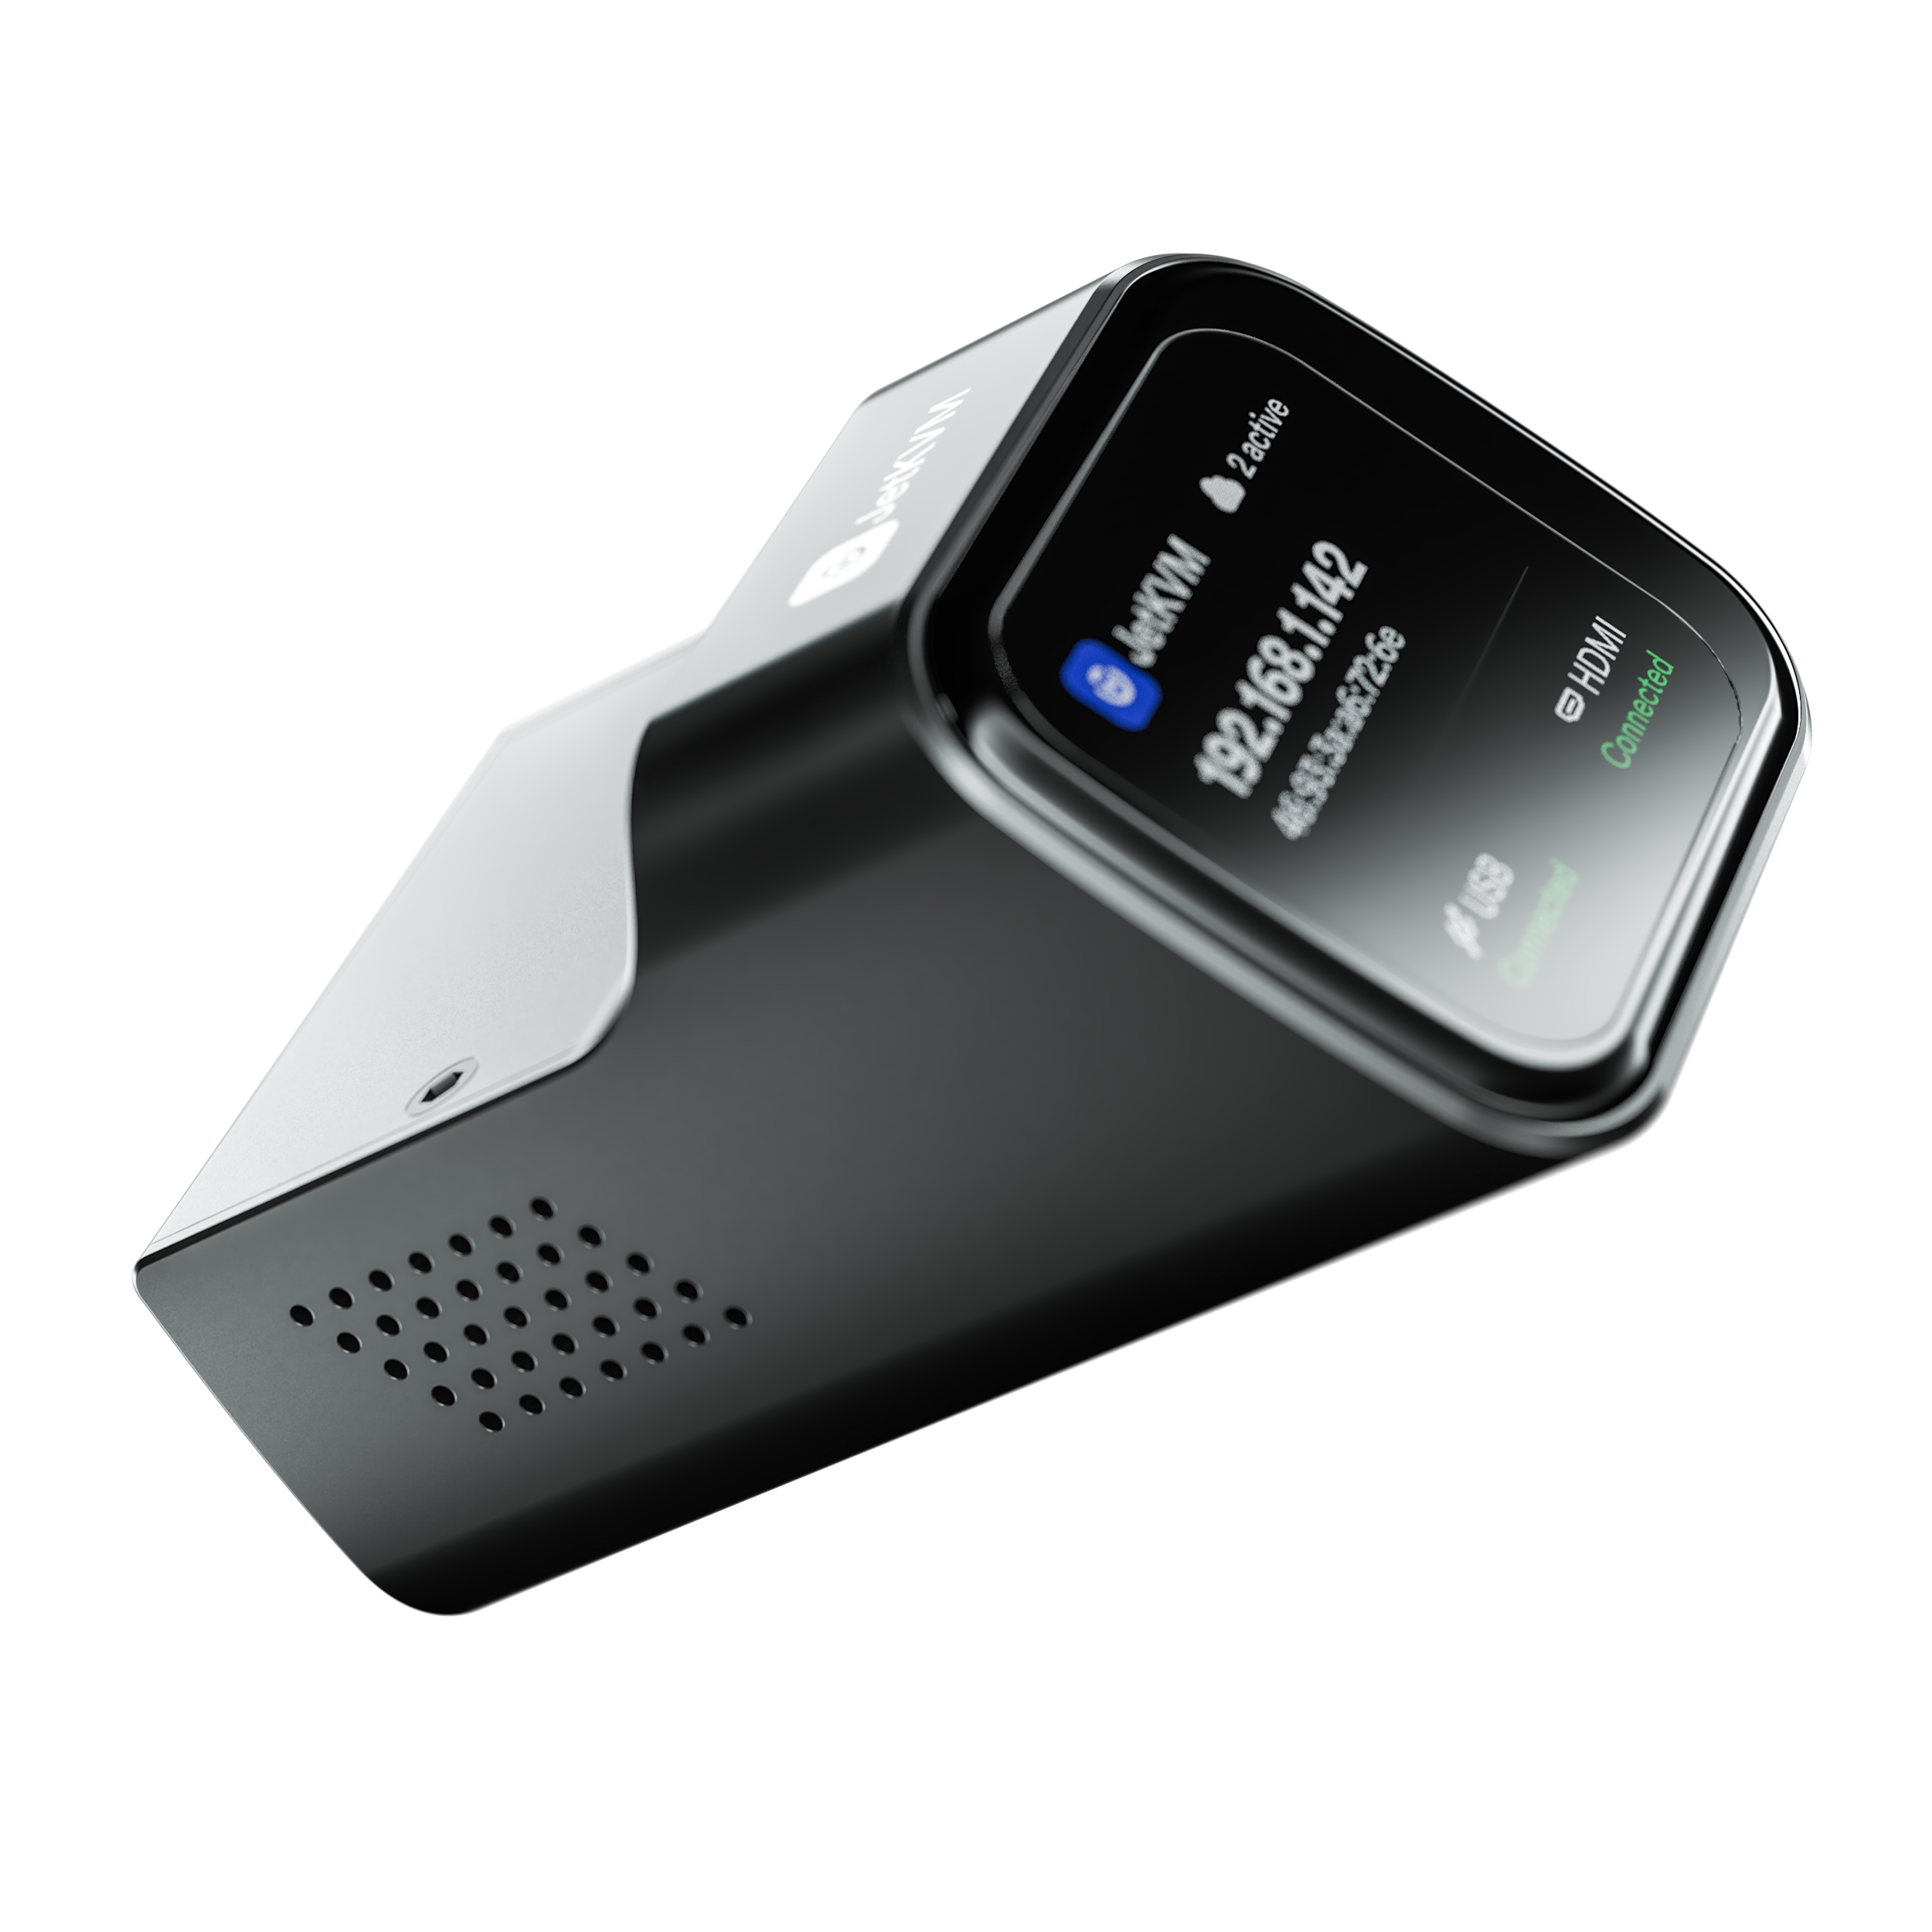
JetKVM is a tiny KVM system that provides remote access to your PCs through a web interface
It even provides an external module for controlling the power that goes into the mini PCs, so that in case the server crashes and fails to restart, you can force it to reboot by cutting off the power and turning it on again. While it’s really nice that the JetKVM provides remote access to my mini PCs, it also brings more headaches to cable management.
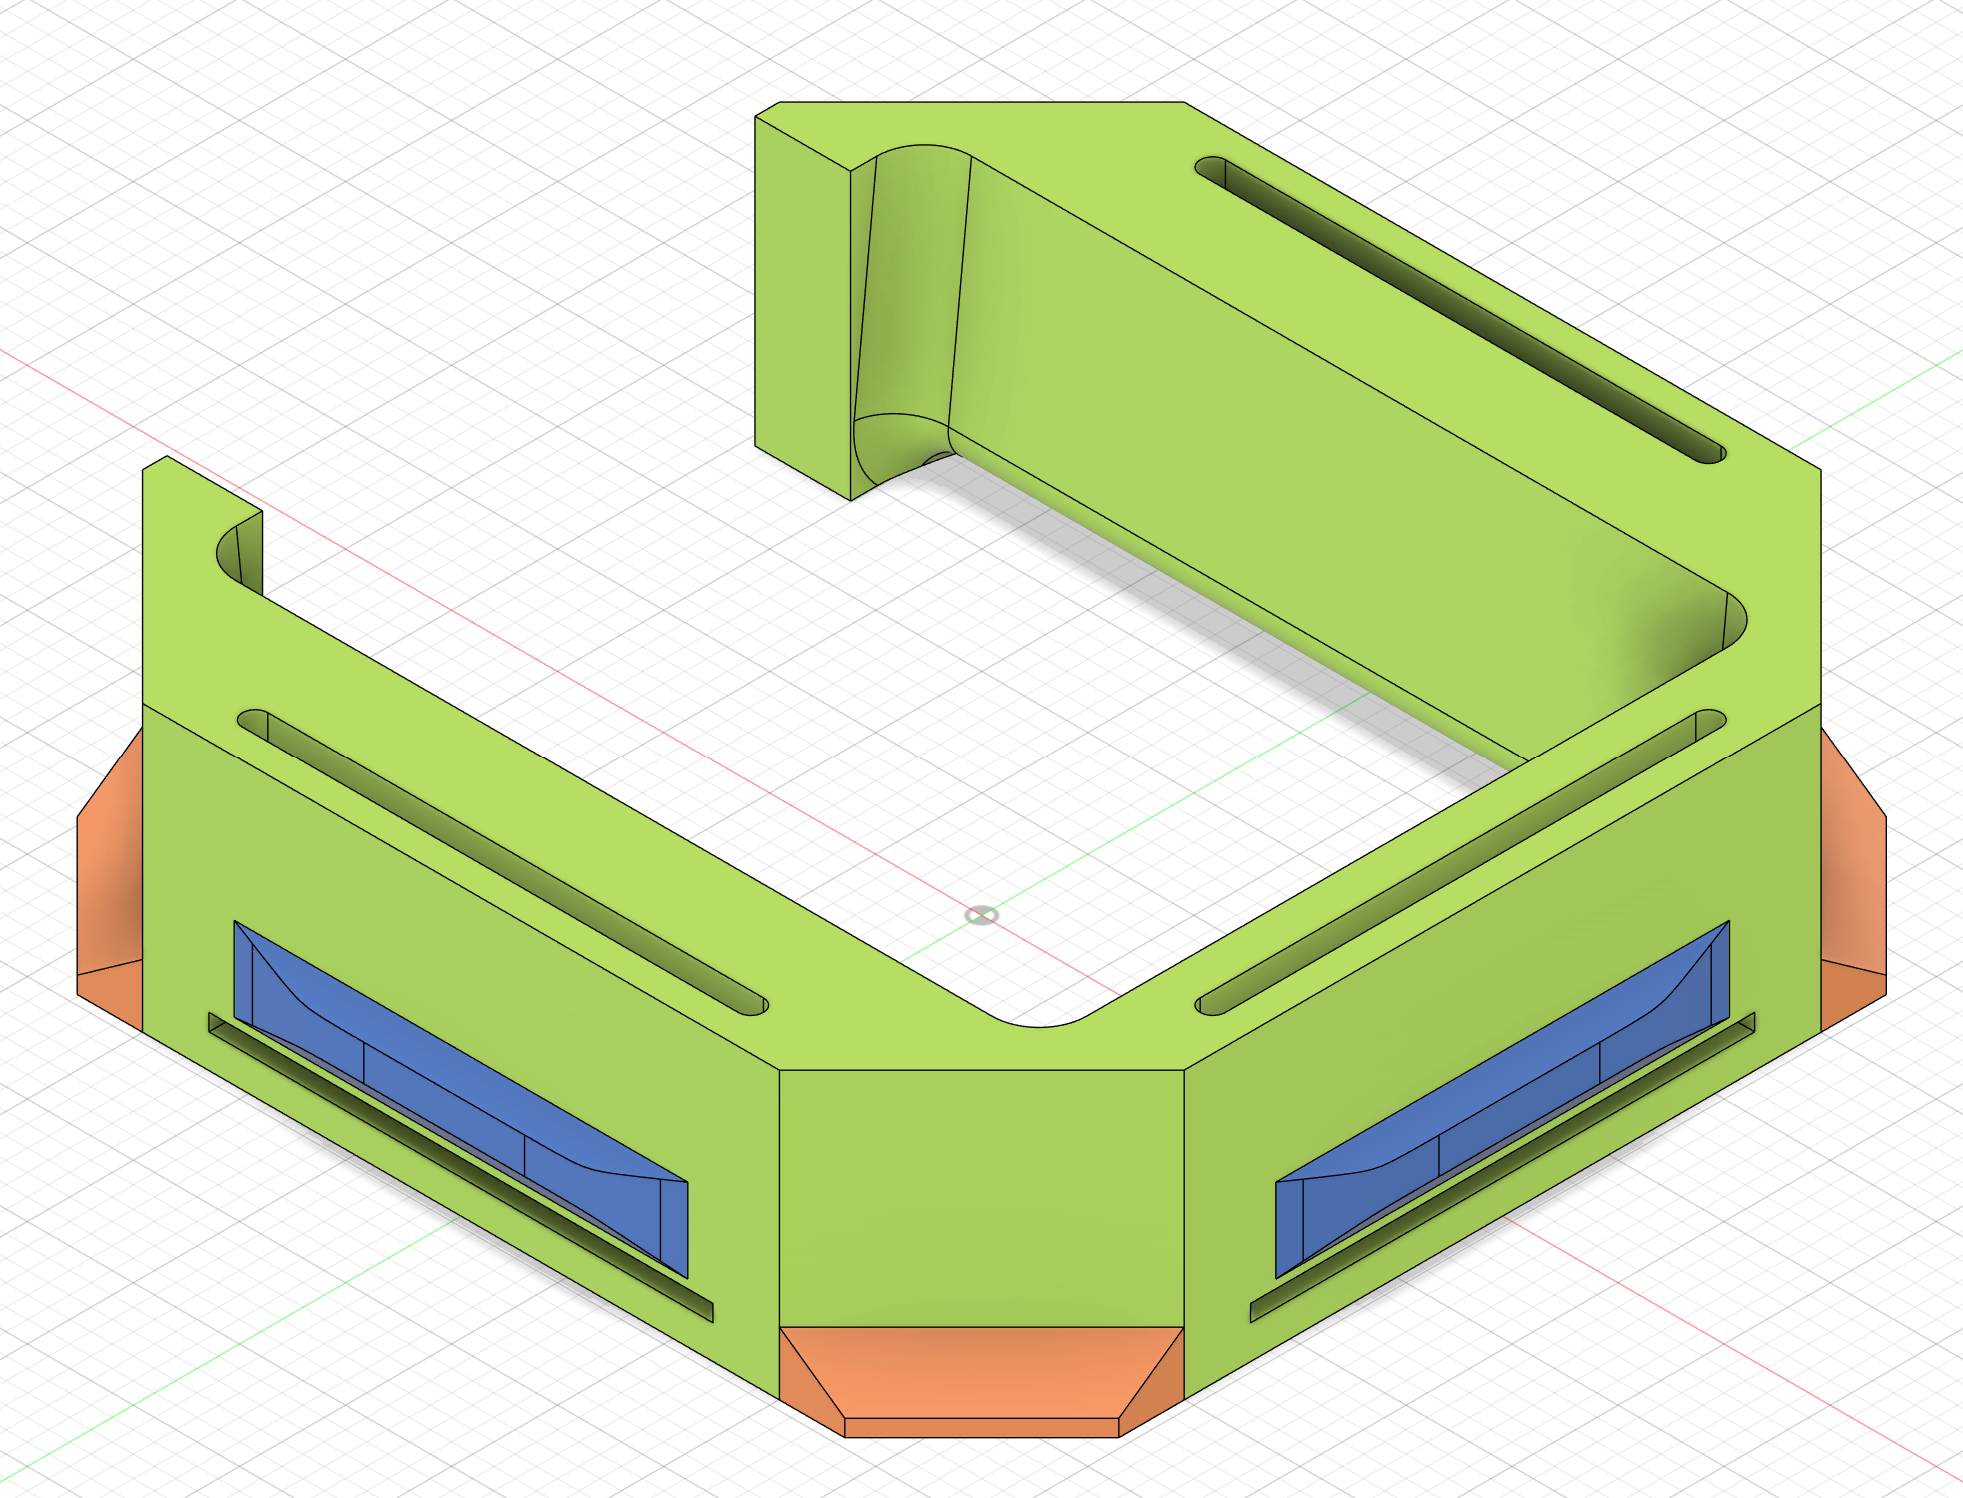
Thanks to 3D printing and the CAD skills I’ve picked up along the way building all these, I soon designed a mount to sit on top of each mini PC and have the JetKVM, the DC module, and the cable sit in place.
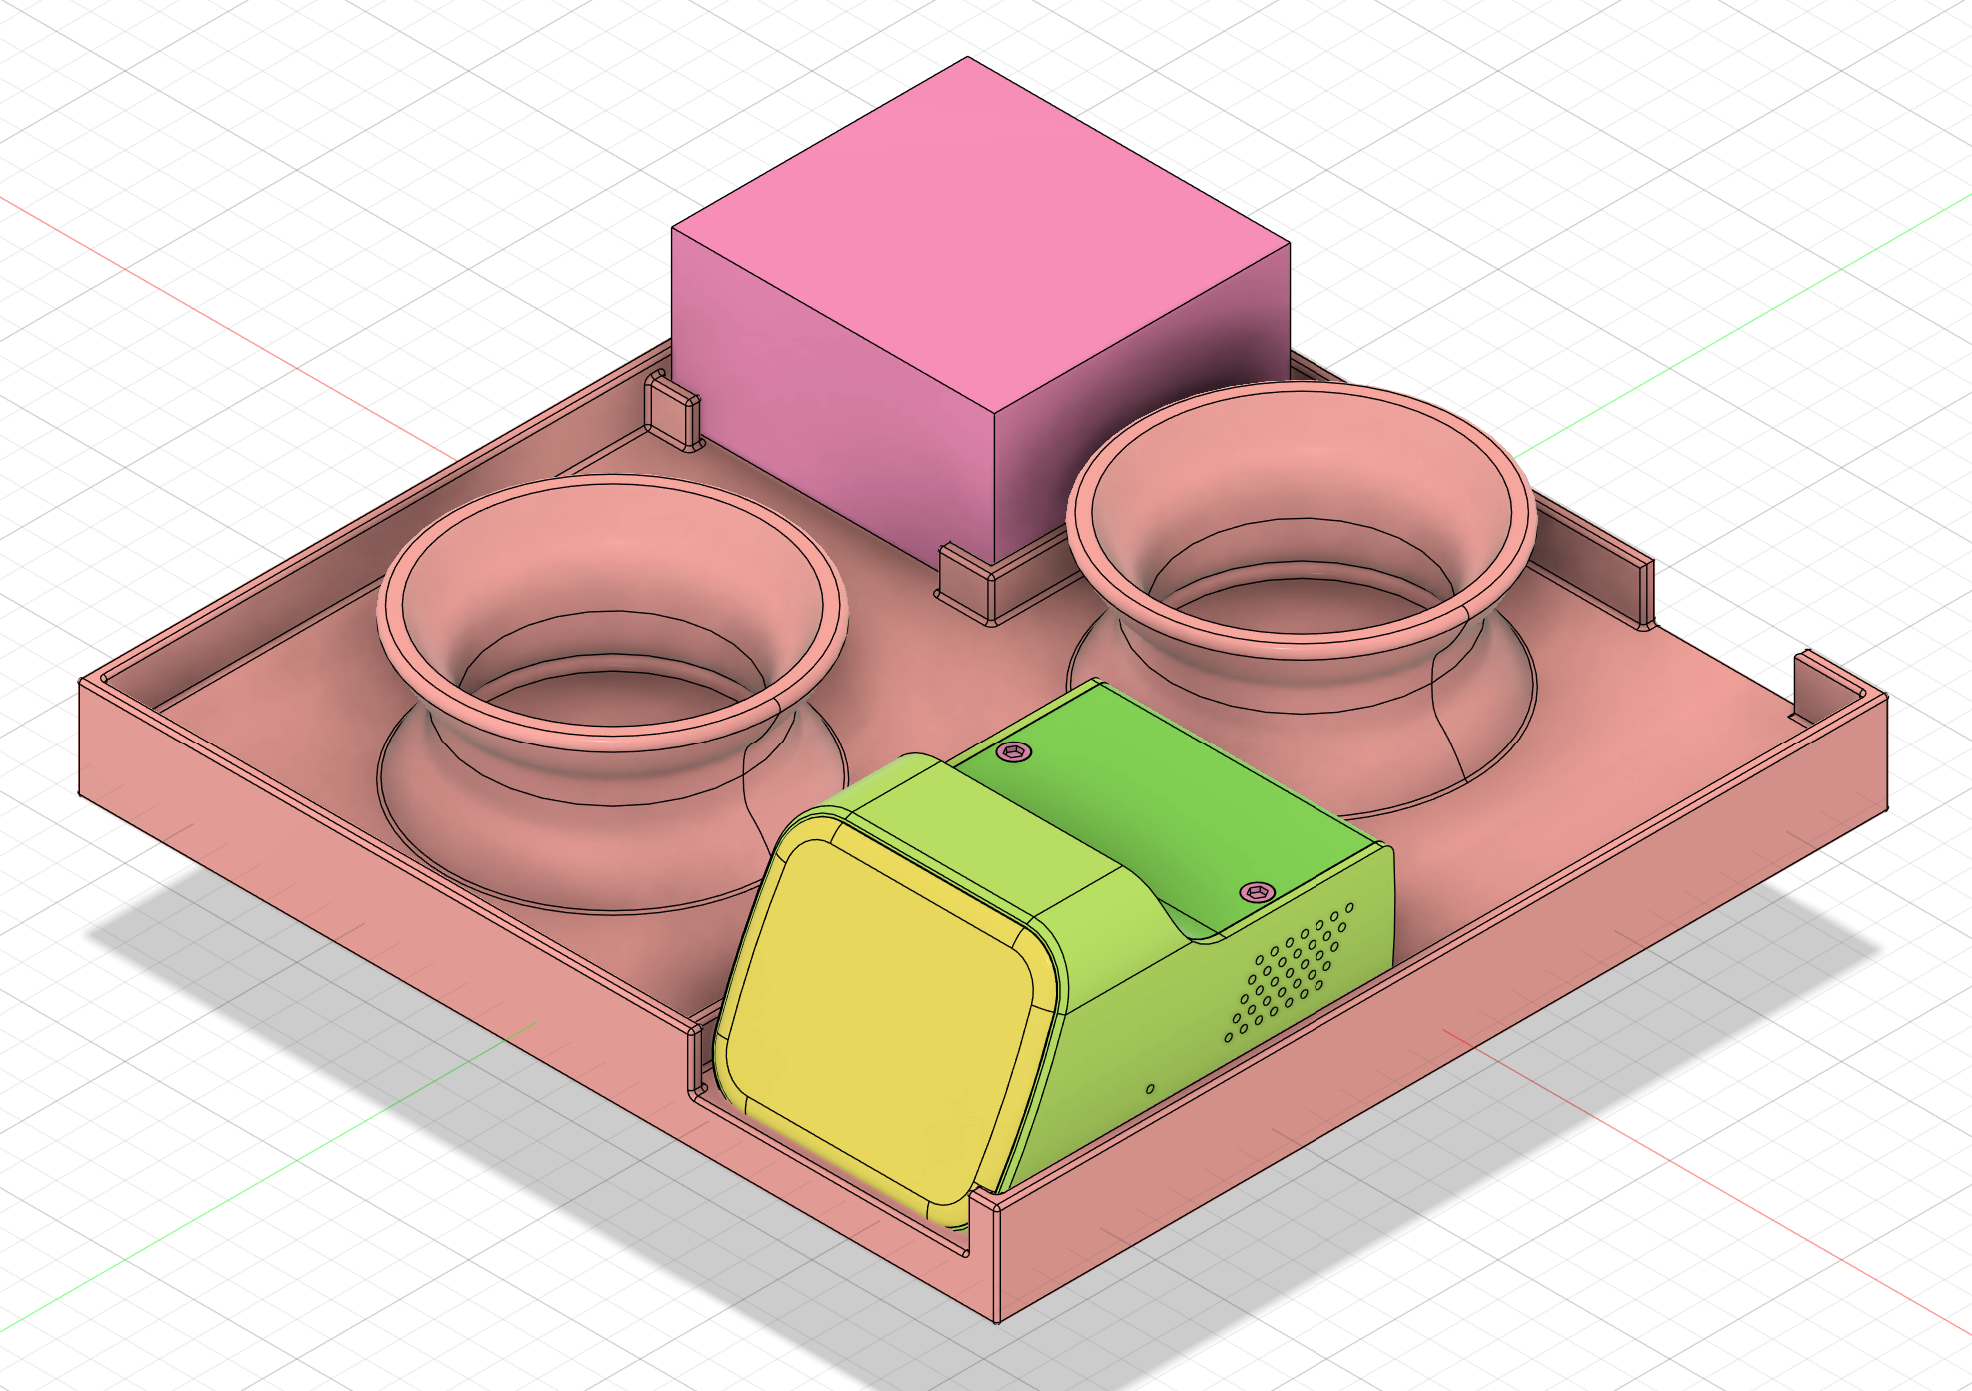
The design of a JetKVM mount in the CAD model
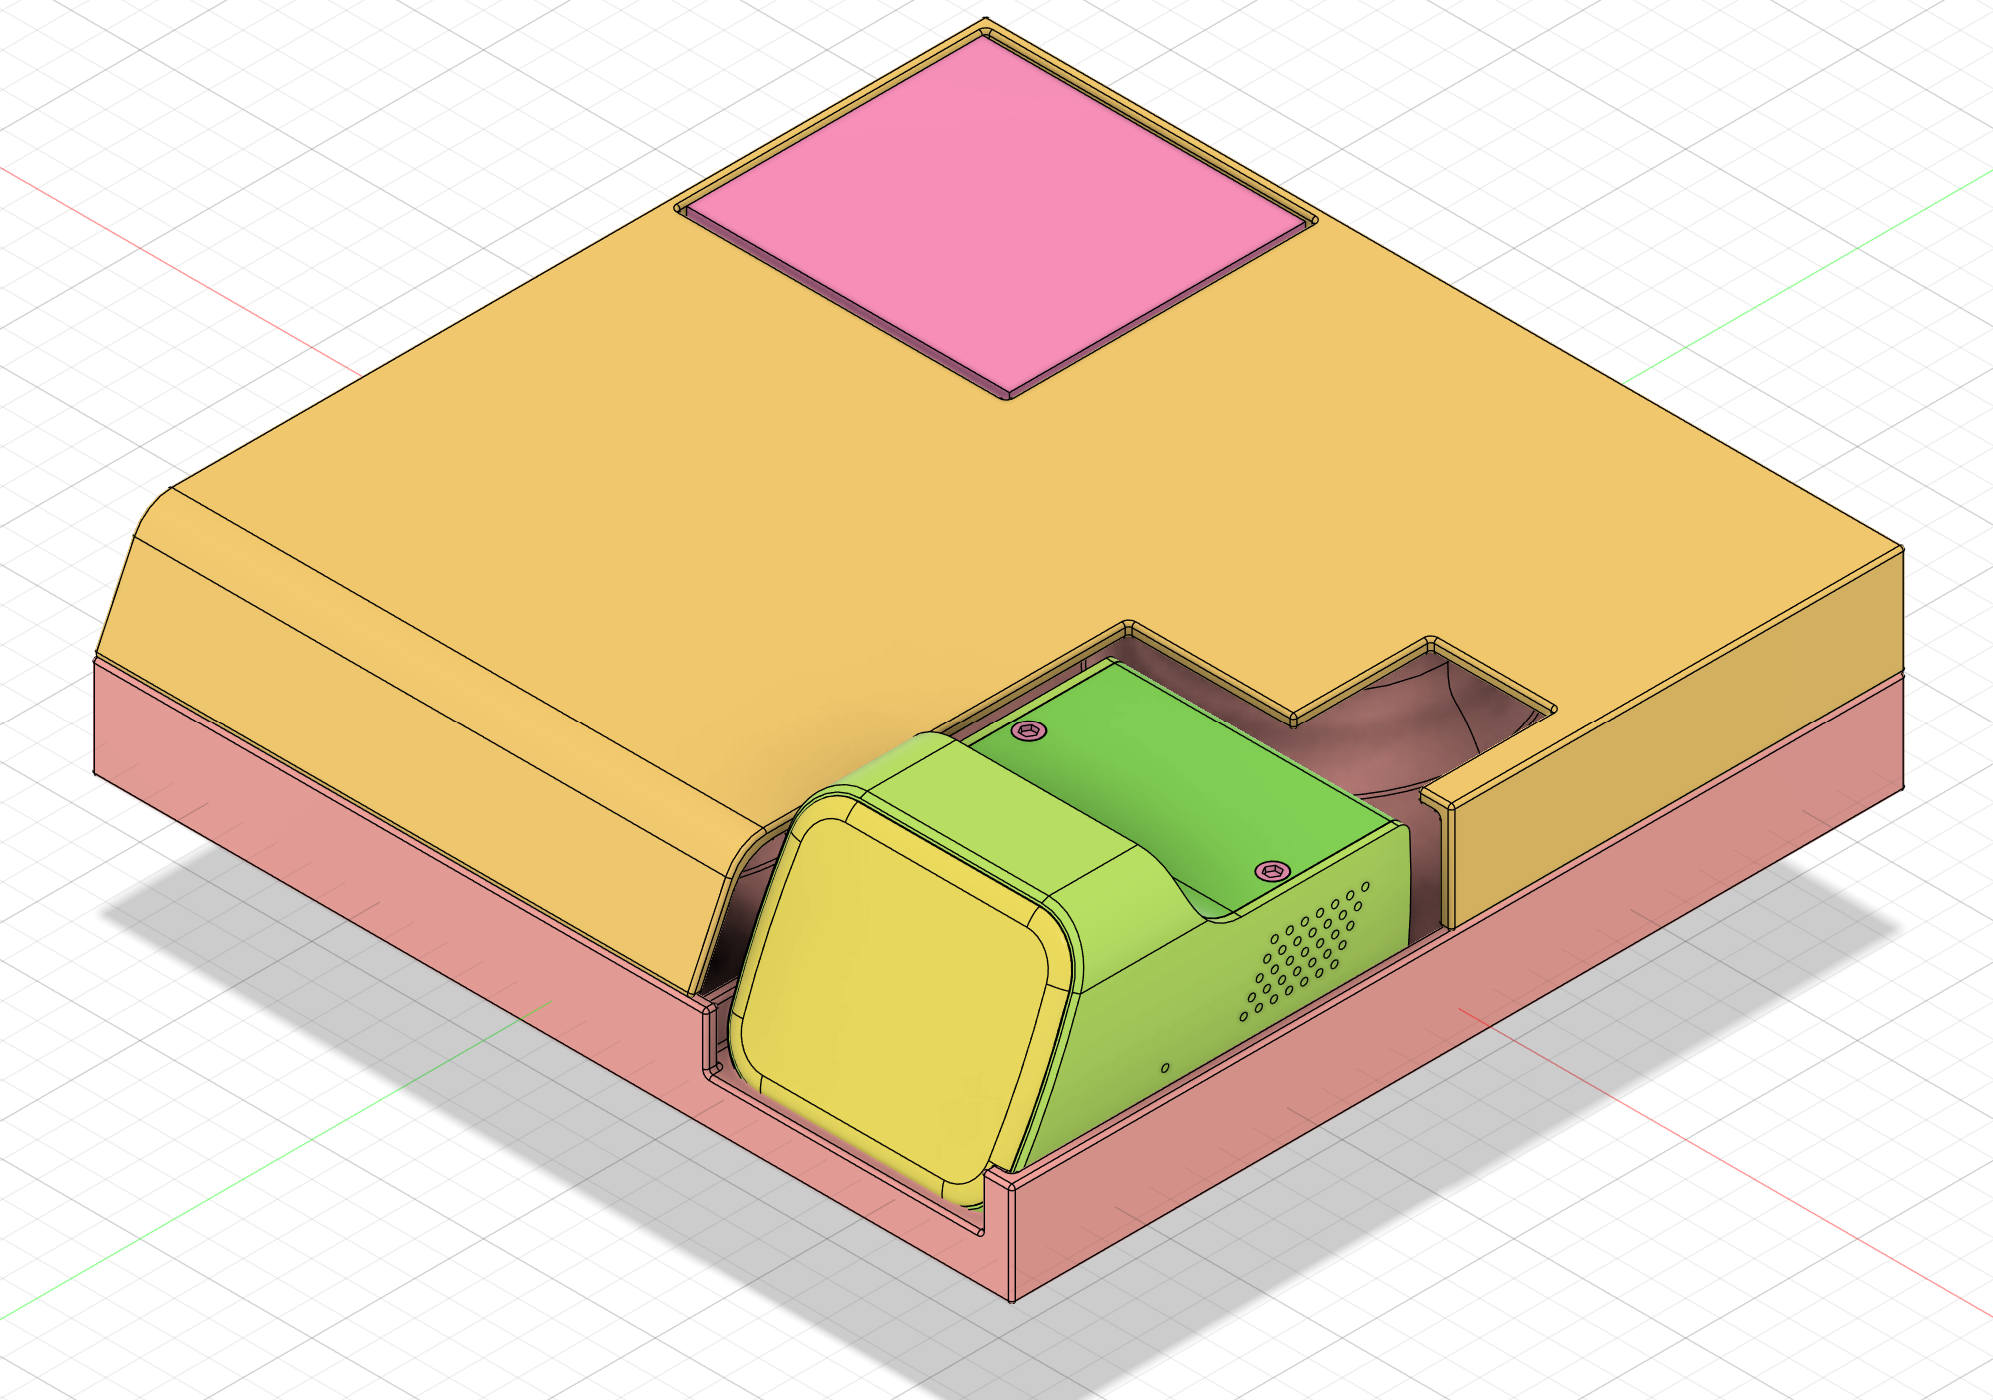
The design of a JetKVM mount with a lid in the CAD model
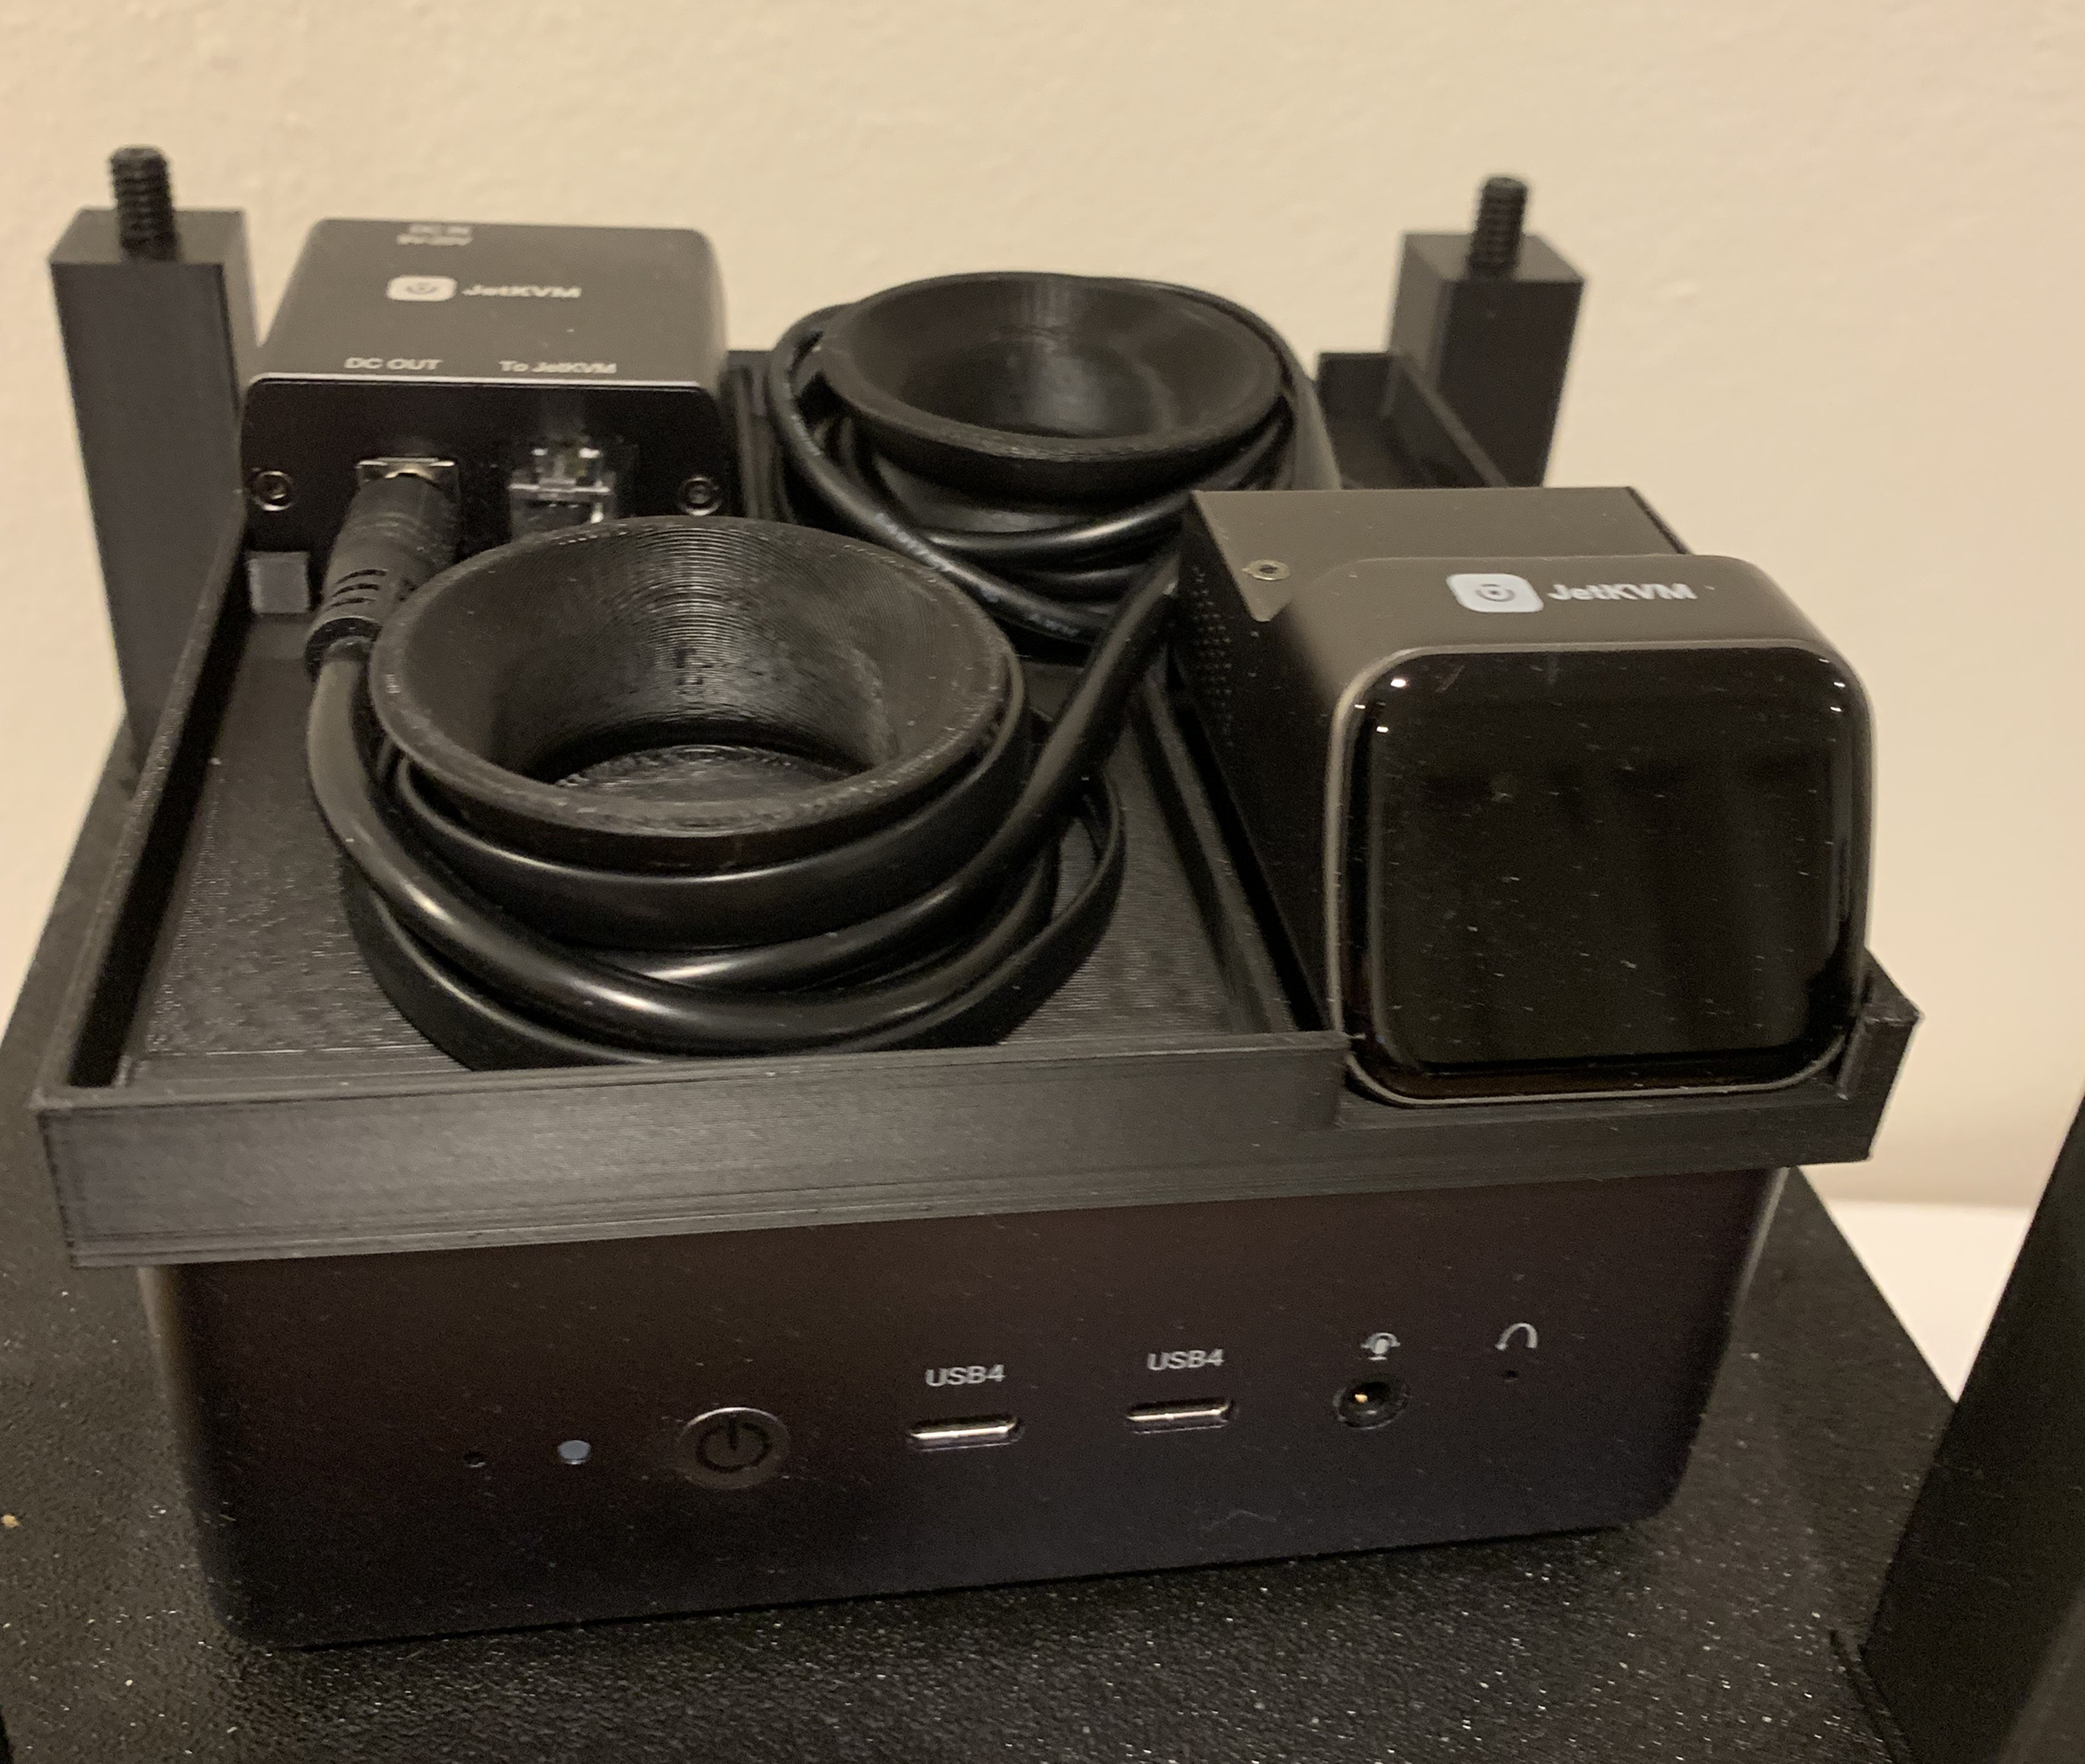
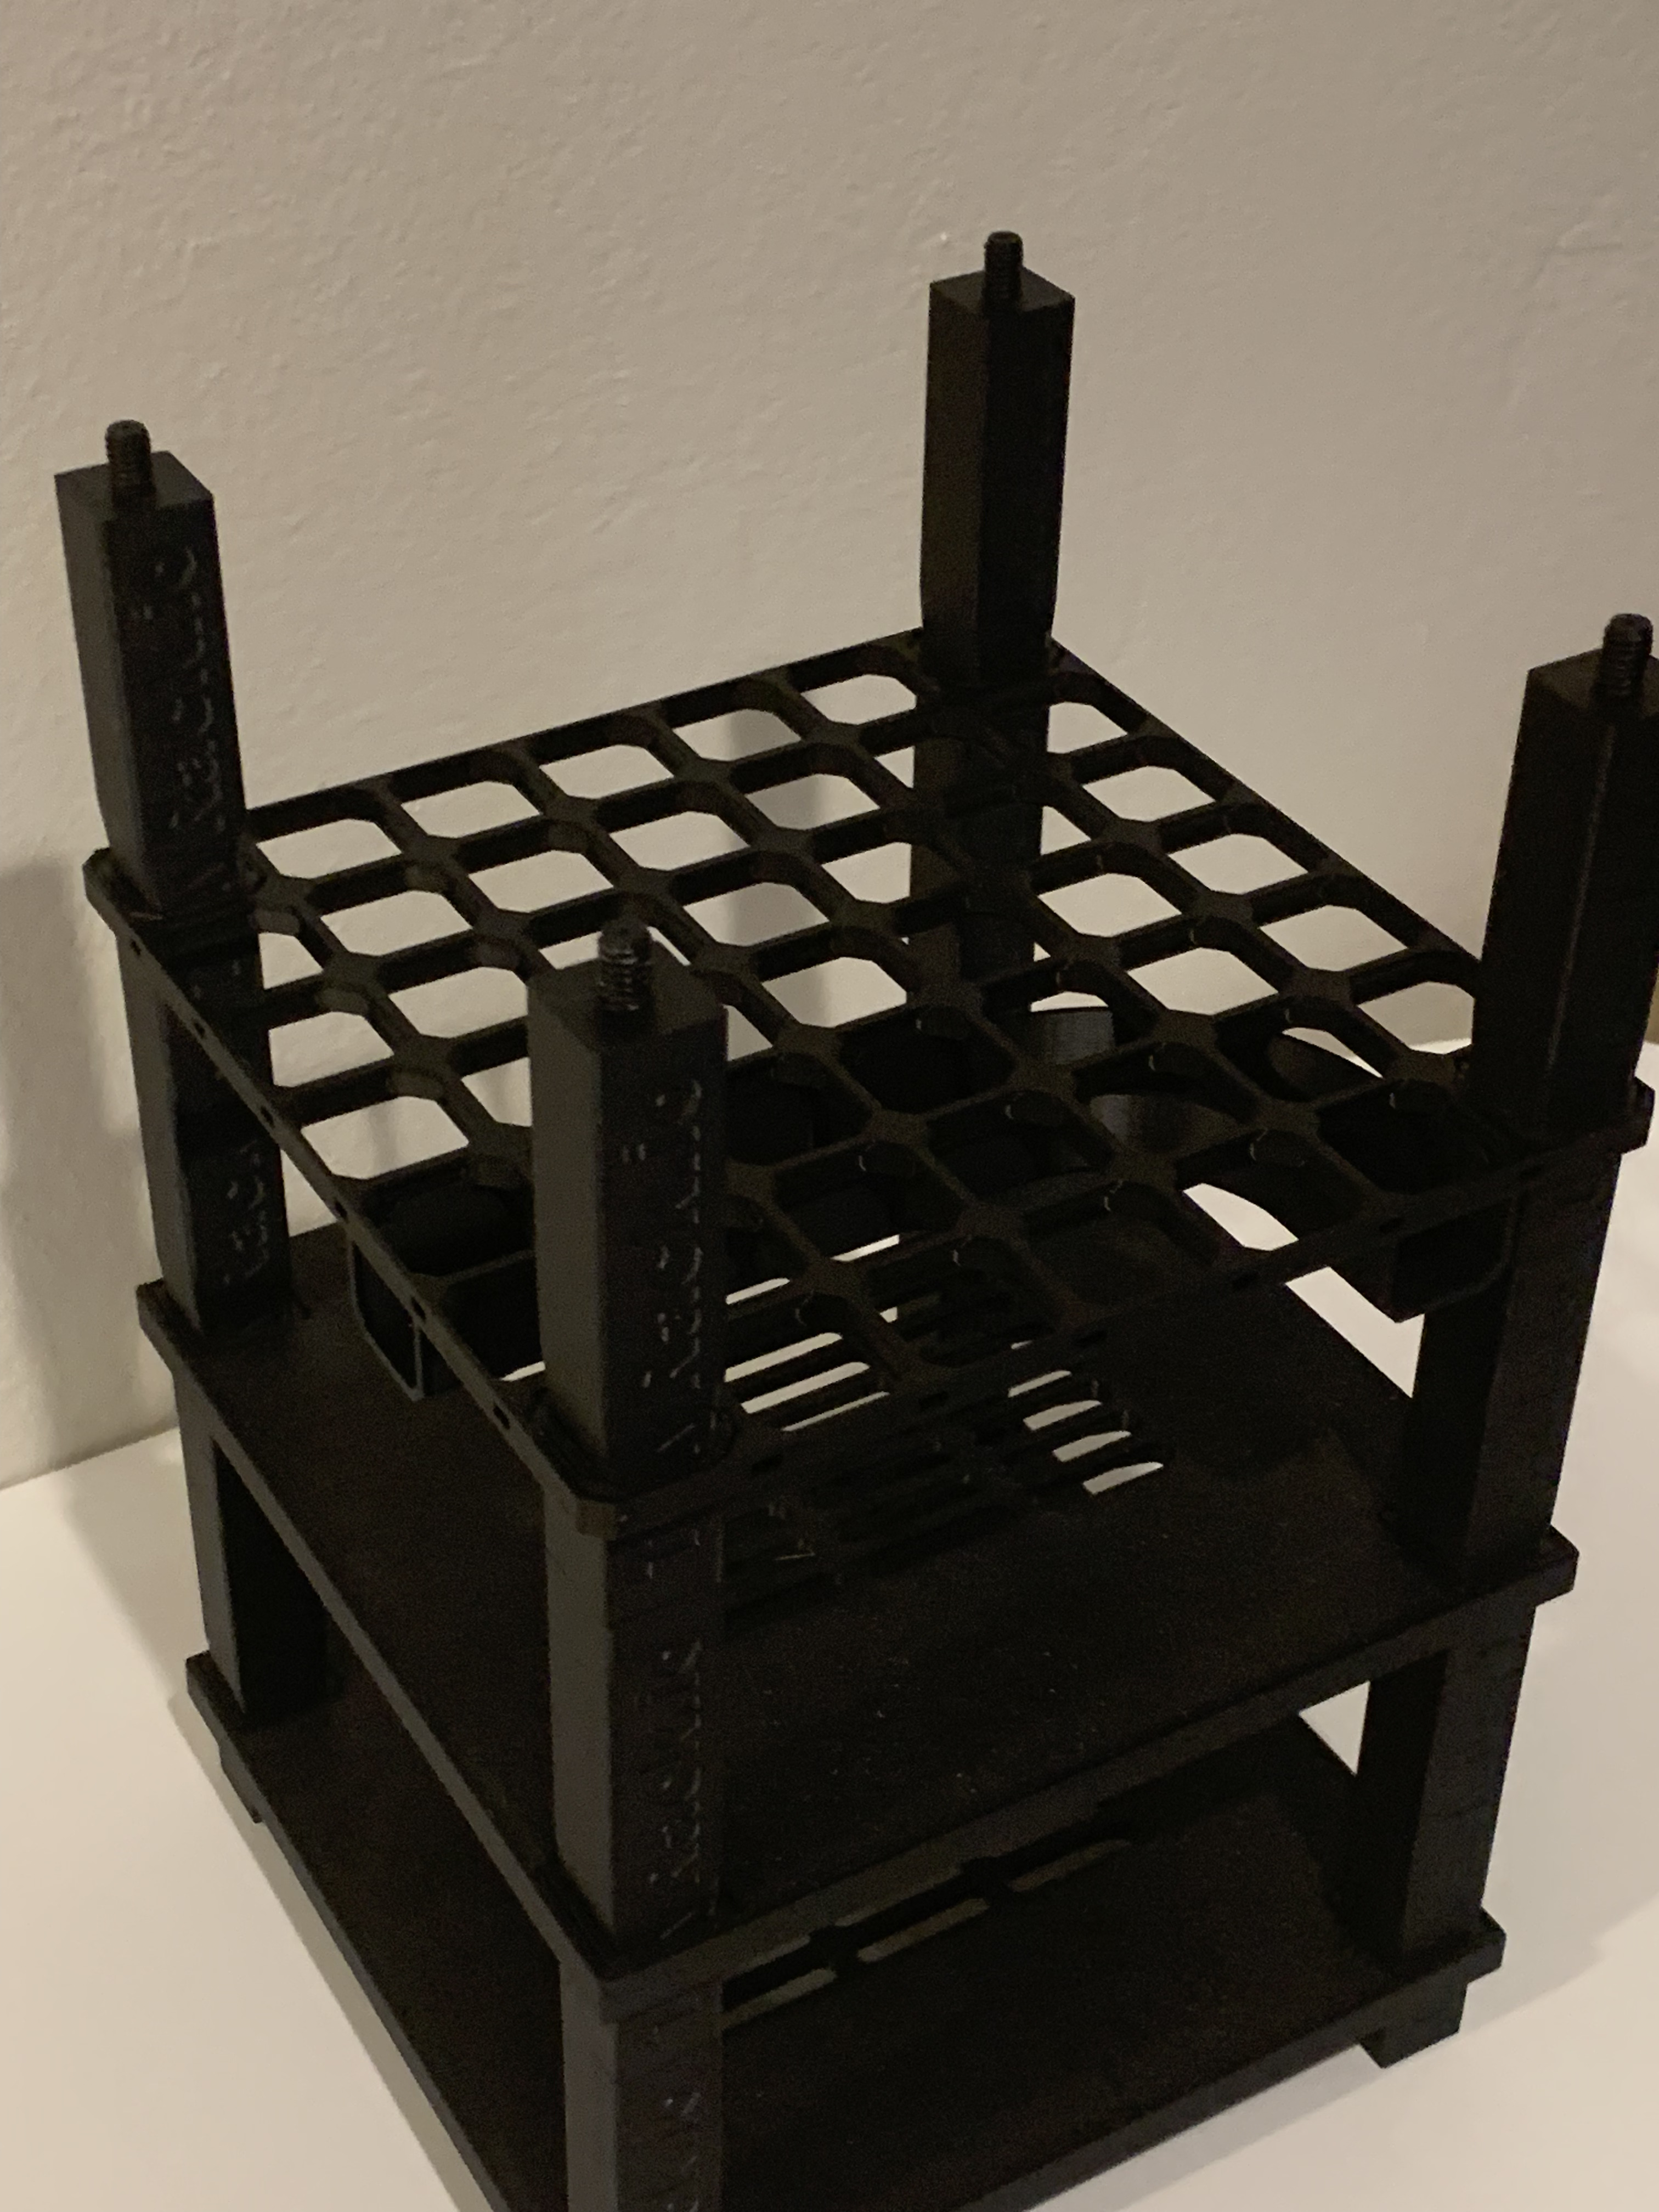
TinyRack JetKVM mount base in real world
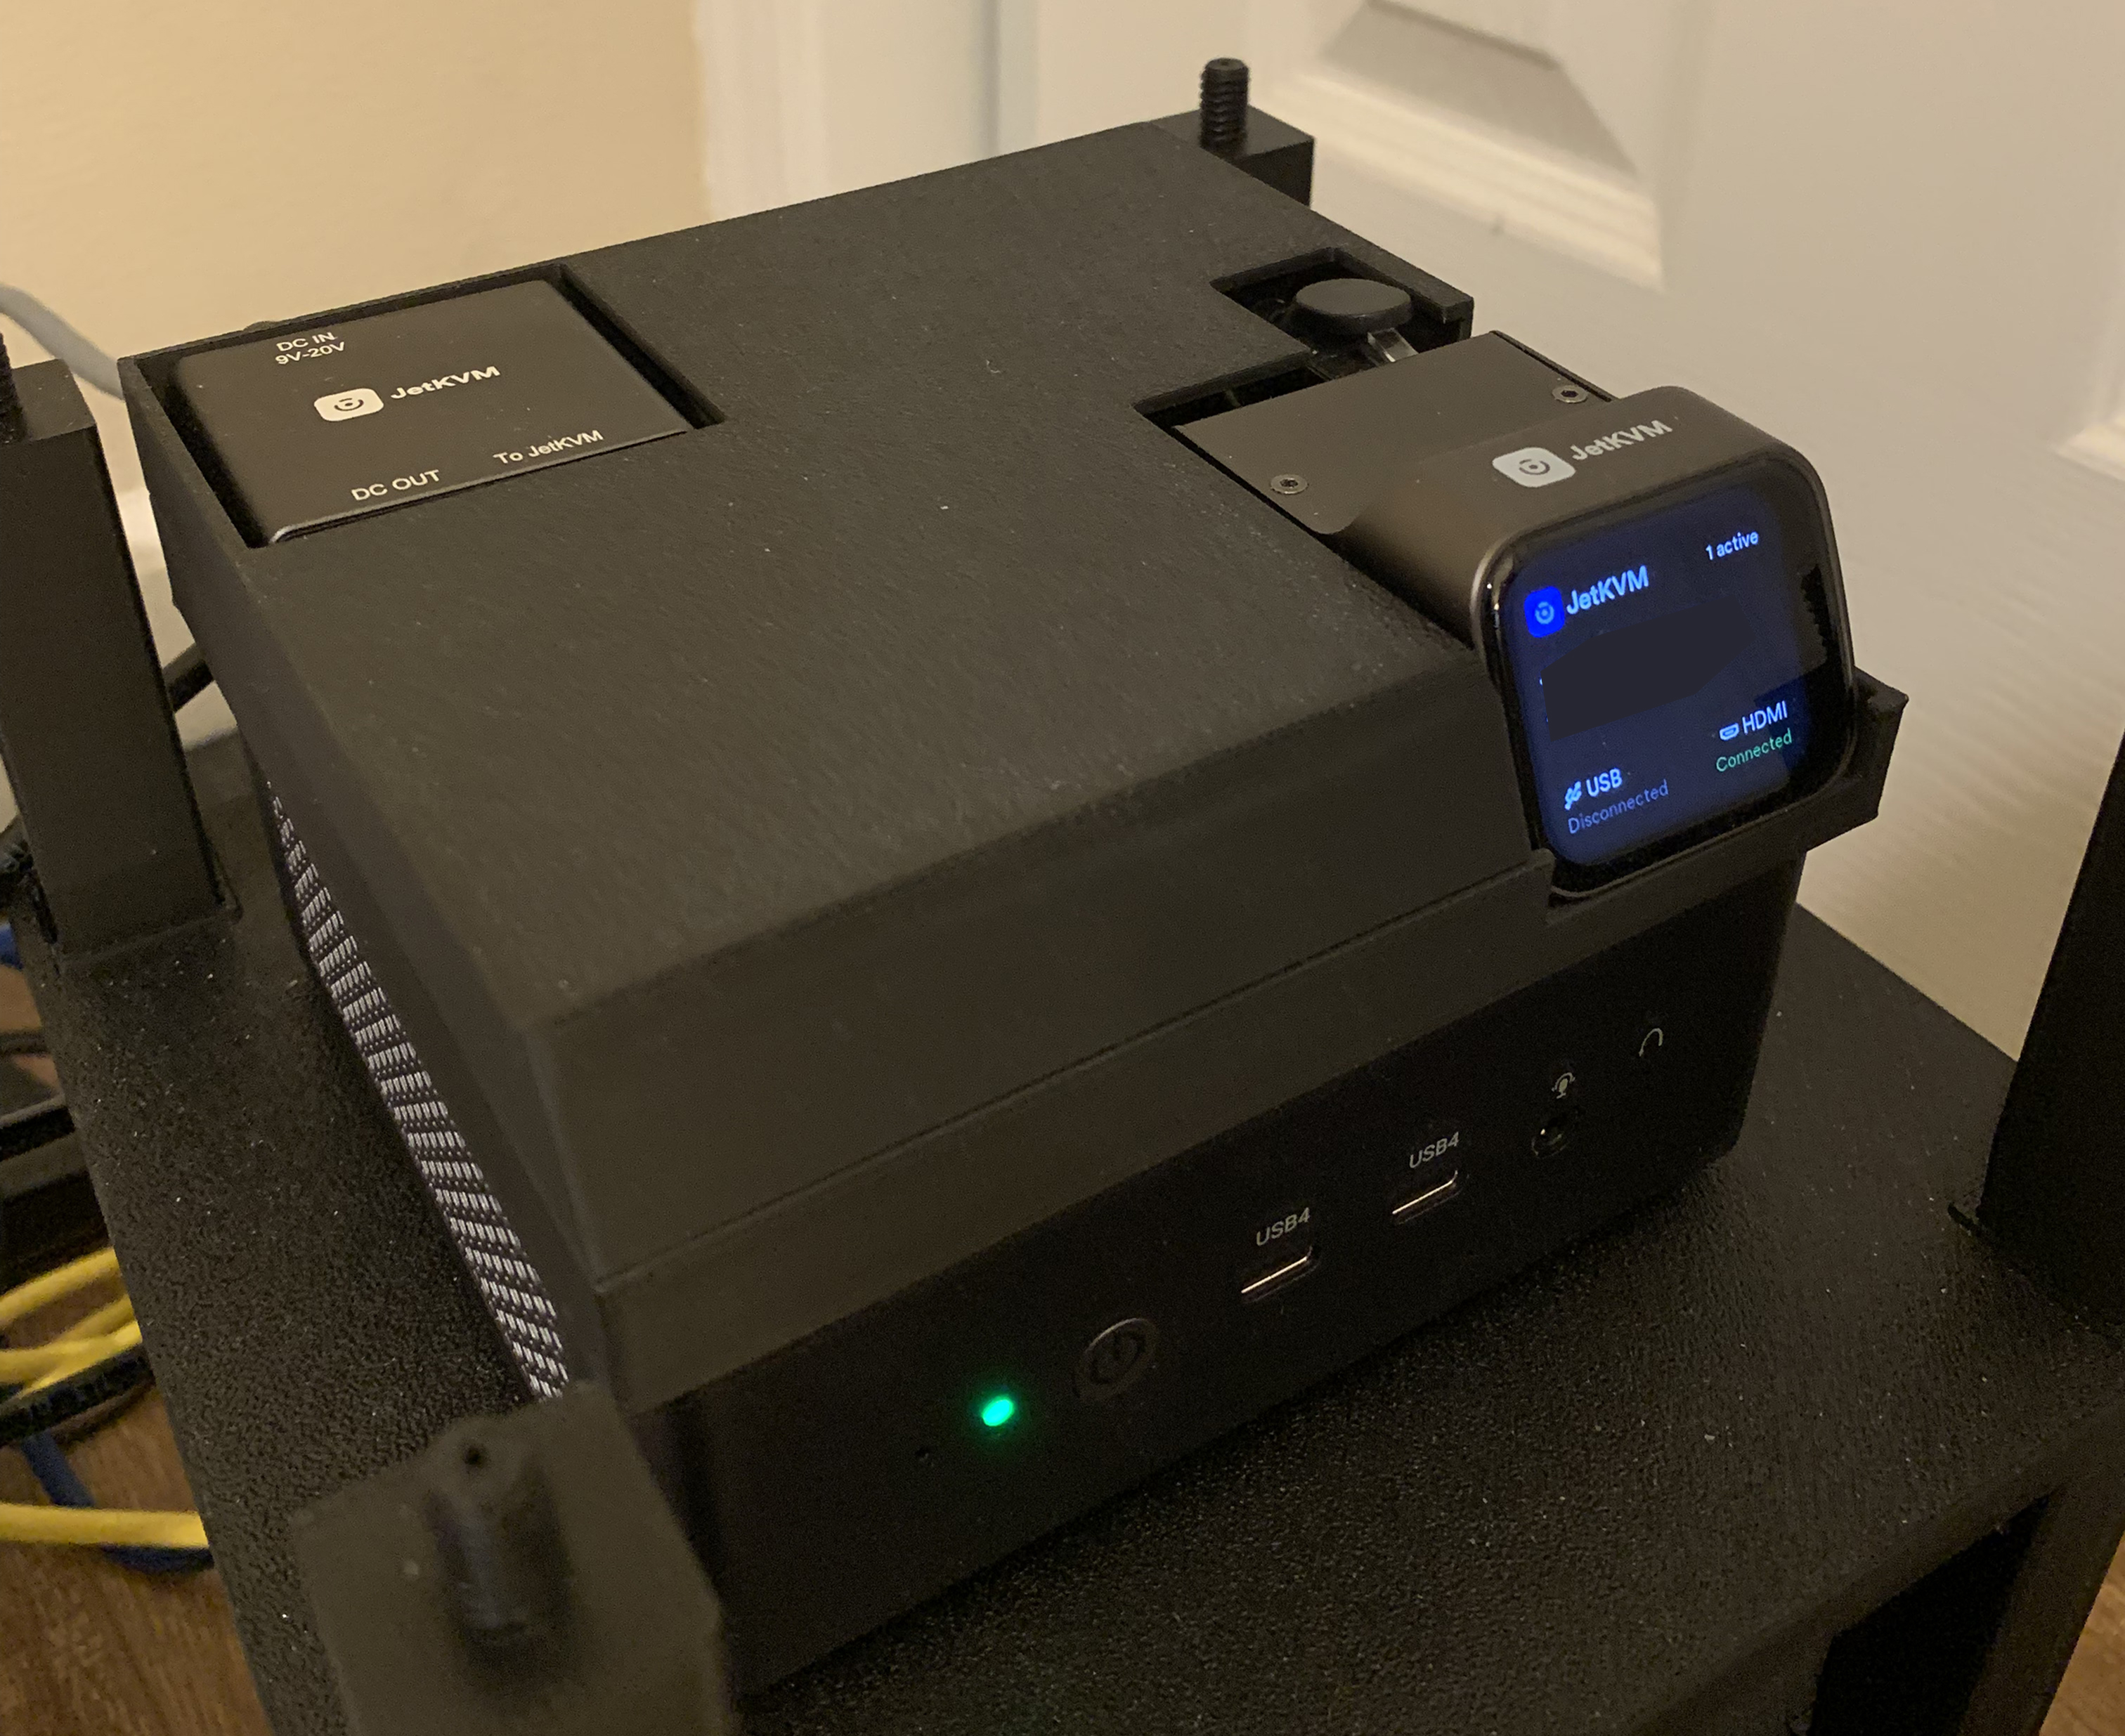
TinyRack JetKVM mount with lid in real world
It looks so beautiful right now, it almost feels like a device designed to work exactly that way as a whole 😍 You can also download my JetKVM mount from TinyRack.io.
openGrid integration
I used to have pretty good cable management under my desk. But over time, as more and more devices were added, it became messy again. With a 3D printer, I started looking into cable management solutions, and I found project Underware.
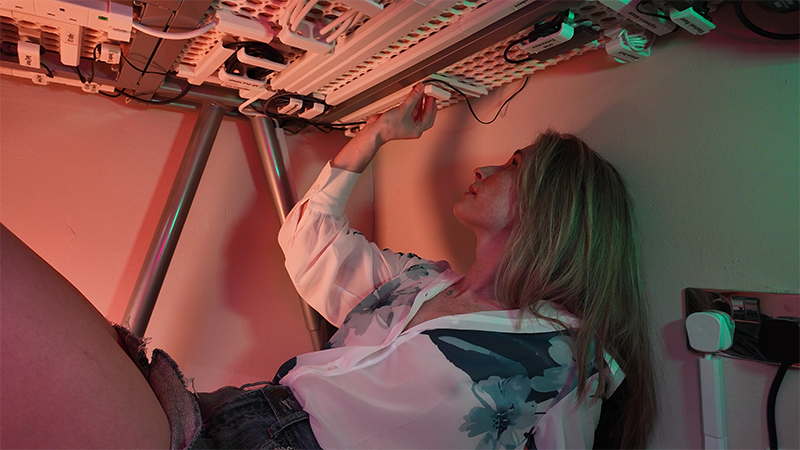
Underware is a 3D printed grid based modular system for under desk cable management by Katie
It’s a grid based modular system to have different modules attach to the grid. This is exactly what I wanted! In the past, when I designed my cable routing under the desk, it was designed as it was. But then when new things were added, the old design didn’t anticipate the new stuff, so it became a mess real quick. It’s really hard to change once the design is settled. With a grid based modular system, I can change the routing any time I want without removing the double tape and applying new tape again.
The Underware 1.0 is based on Multiboard, and the license of Multiboard is a bit odd. All of your creations derived from Multiboard go to the author of Multiboard and allow them to use them freely as they see fit. I guess this could be the reason, the author of Underware switched to openGrid in Underware 2.0. It’s a similar grid based modular system, but with a CC-BY license.
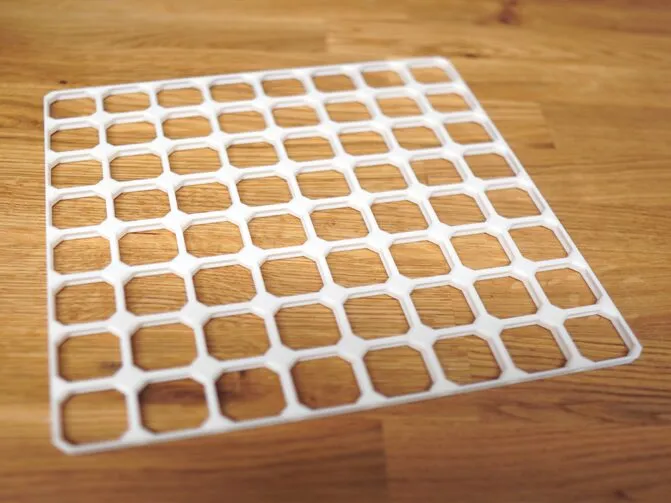
An openGrid grid from Katie's Underware 2.0 website
After I built some cable management with Underware 2.0, I really liked the ecosystem behind it. I looked at my TinyRack system and wondered, why not make it possible to integrate TinyRack with openGrid? That way, we can have a modular mounting system that can grow vertically and potentially horizontally. With that in mind, I’ve designed an adapter to mount an openGrid panel to TinyRack posts.
The design of a TinyRack adapter for openGrid in the CAD model
TinyRack with openGrid on the third layer with some Underware 2.0 modules attached to it
Now, with TinyRack and openGrid adapters, things get very interesting. You can build different kind of layers, some of them can be used for cable management, some of them can be used for holding devices. I plan to introduce more modules, like ethernet patch panels.
Please note that while openGrid can carry some load with TinyRack adapters, they are not designed to carry a ton of load, unlike the TinyRack platform. It’s not tested yet how far we can push the grid with load.
More to come
That’s it! It’s a super fun 3D printing project. I have learned so much about CAD tricks and 3d printing knowledge while building these. Actually, I have built way more than described in this article. I will find time to share more of them later.
In the meantime, other than building it for my own servers, I want to see if I can run it as a side business. If you don’t have a 3D printer, remember, you can also purchase them on TinyRack.io. Also, at this moment, all the models come with fixed parameters, but in the future, I may build online tools to make customizing much easier. Thanks for reading, stay tuned for more!